12 Essential Steps Mac Users Need To Take At Year End

Business users often experience a year-end slowdown that presents a timely opportunity to catch up on a few overdue tasks. As meetings slow and work schedules and to-do lists often ease, forward-thinking professionals can use the brief lull to ensure the computer powering their daily activities is ready for the coming year. Such diligence isn’t just for Windows users, but those using Macs, too. Here are the year-end steps you should take to ensure your Mac is ready for 2024.
Jump to:
Confirm backups
The most important task and step you should perform first is review your backups to ensure the documents, spreadsheets, presentations, images, videos and other files stored on your computer are properly backed up.
Hard drives, whether traditional mechanical drives or SSDs, routinely fail. So check your backups to confirm they’re working properly and backing up the files you need. This is true whether you’re using Time Machine and backing up to an external drive or two or a cloud-based solution such as:
SEE: TechRepublic’s comprehensive iCloud guide
Check system health
After ensuring your Mac’s files are properly backed up, confirm the Mac itself is operating properly. Using an Apple silicon Mac, run Apple Diagnostics by pressing and holding the Mac’s power button until you see the Options icon display on screen, then release the power button and press and hold both the Command and D keys. (Different steps are required to run the diagnostics using an Intel chip-powered Mac.) Apple’s test checks numerous components, including a Mac’s sensors, battery, Bluetooth and Wi-Fi equipment, storage drive, processor and memory. Review the results and address any issues that arise with your company’s IT staff or an Apple technician as recommended by the diagnostics utility (Figure A).
Figure A
Install system updates
Throughout the year, it’s easy to get distracted and put off installing a Mac’s system updates. These performance enhancements, software fixes and security patches, however, help your Apple desktop or laptop run more reliably and securely, so ensure you check the Mac’s Software Update status at year end and then monthly after that.
To check for and install Mac updates, click the Apple icon from the Mac’s menu bar, select System Settings, then click General. Click the Software Update option, which will display more information regarding the Mac’s installed system version and provide an opportunity to download any available updates.
Review installed apps
Over time, various software programs and packages often get installed on your Mac; for instance, you might download a program to test its features or load an application and use it once. Unneeded programs consume disk space – storage space that’s often at a premium due to the popularity of smaller but faster SSDs – and potentially even memory and processor resources if they load automatically at startup or operate in the background.
Year end is an opportune time to review the applications installed on your Mac and remove those you no longer need. Uninstall unnecessary apps either by deleting them from the Mac’s Applications folder or by using a third-party uninstaller app such as Pocket Bits’ App Uninstaller that better deletes programs by also cleaning various associated leftover detritus, too.
Update apps
Just as it’s important to download and install system updates on your Mac, you should perform the same step for your software programs. These performance patches and security fixes help your apps run more efficiently and securely while also often introducing new features and enhancements.
Download and install updates for applications purchased through Apple’s App Store by opening the App Store, clicking Updates and updating any programs for which updates are available but haven’t yet been installed. Other software programs installed independently require being updated directly from the application.
Review automatic startup items
Year end is also a great time to review the programs and services that automatically load whenever you start your Mac. Odds are a few old programs or applications you really don’t use anymore are still loading at startup and robbing your system of memory and processor capacity that could be better used servicing other tasks.
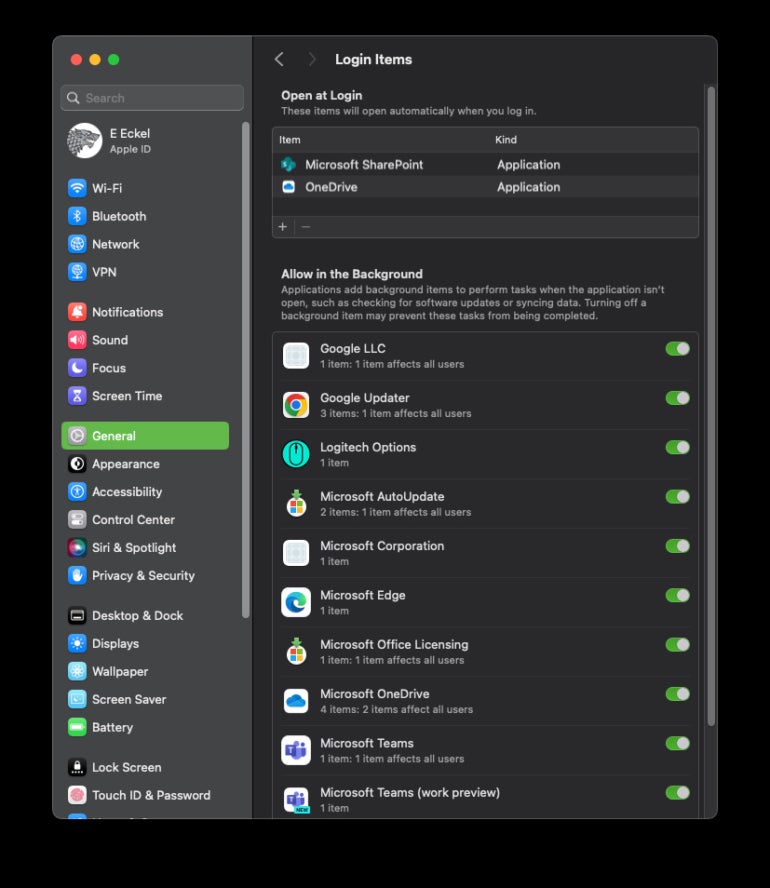
Open System Settings, click General, then Login Items. Click the – icon to remove any applications that are loading unnecessarily at startup, and use the provided radio buttons (Figure B) to disable automatic startup for any apps you don’t need running unnecessarily in the background.
Figure B
Confirm malware protection
Confirming your Mac’s antimalware protections are operating properly is another smart task. While you should complete such checks regularly, the end of the year is one way to ensure the step, which can potentially prevent all your files and information from becoming corrupted, isn’t overlooked.
As part of your check, confirm the Mac’s firewall is enabled, the antimalware software is running without displaying errors or alerts and that recent scans haven’t reported errors or issues requiring additional intervention.
Run a full malware scan
In the last step, I recommended checking to ensure your Mac’s antivirus scans haven’t reported issues, incidents or errors. As part of your year-end maintenance routine, be sure your Mac’s antimalware application is actually set to occasionally run a full system scan, too.
Often, to save time and resources, antimalware apps run quick scans, but trouble can lie deeper within cached files, libraries and other areas that are inadvertently skipped by less-intensive scans. Only by completing a full scan can you ensure those areas have also been checked, and nefarious files aren’t possibly lurking there.
Remove junk files
Internet caches, web browser cookies, system and application updates and a host of other sources and processes can leave unneeded files behind. This is especially the case with web browsers that cache (or save) information from the websites you visit.
Over time, these files can consume surprising disk space and slow your Mac’s performance. Removing junk files at year end helps ensure you start the new year with a fresher, better performing setup.
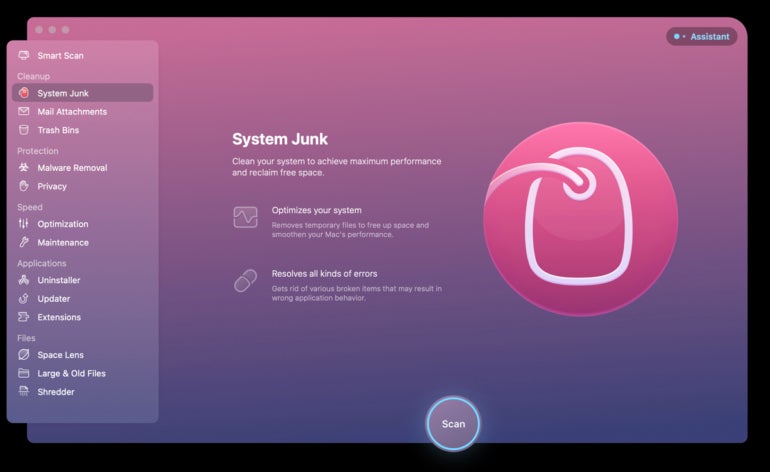
While Macs include integrated tools to help manage storage (e.g., you can open System Settings, select General and click Storage to adjust files stored in iCloud, optimize storage and empty the trash automatically, as shown in Figure C), third-party apps to better assist removing junk files; examples of these apps include:
Figure C
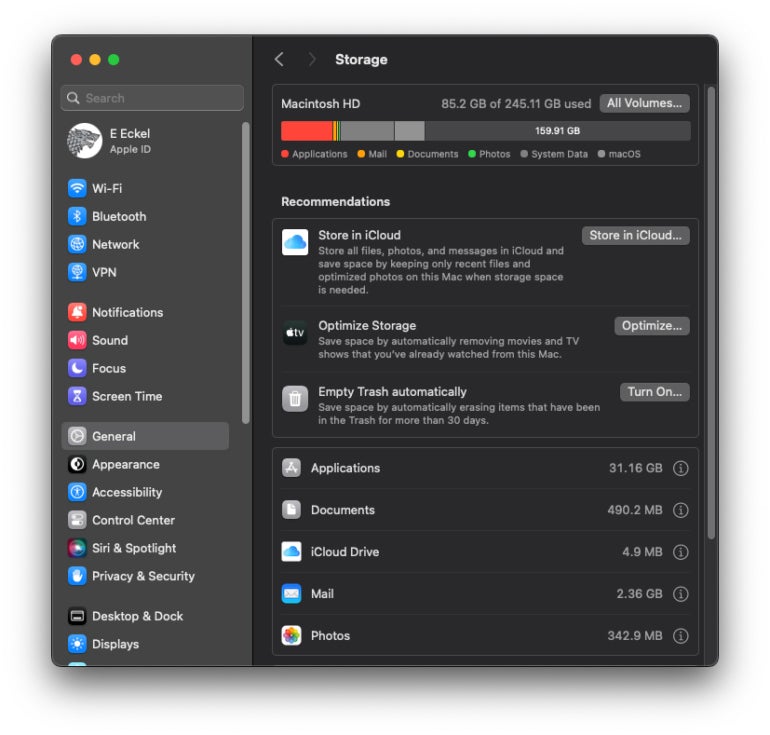
Figure D
Archive unneeded files
Just as unnecessary applications and junk files naturally accumulate on a Mac, so do unnecessary files you purposefully create and download. Some such files, whether high-resolution images, videos or similar, can consume large amounts of space.
If you no longer need these files, delete them. If you might need the files someday but at no time in the foreseeable future, consider archiving them to an external hard drive or cloud storage service. If you’re unsure where the largest files on your Mac reside, a third-party utility can assist; examples include:
Figure E
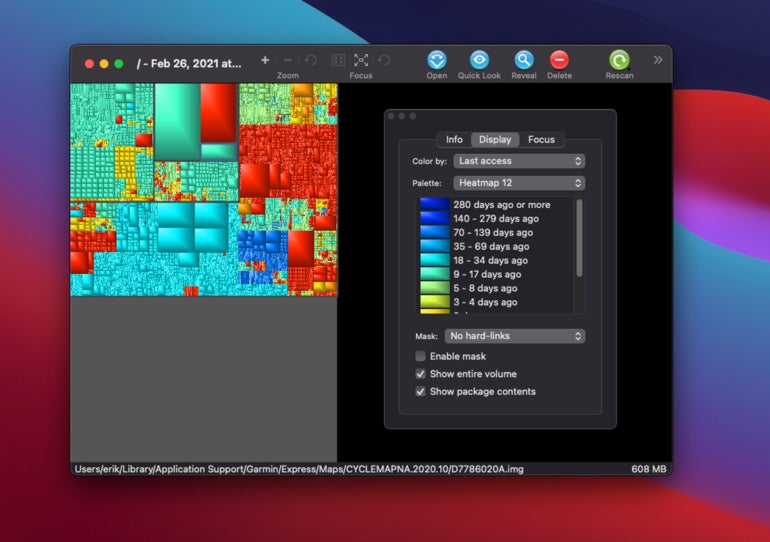
GrandPerspective is a third-party utility that helps quickly identify large files stored on a Mac to assist managing and archiving data. Image: Erik Eckel
Tidy files and folders
Throughout the year, especially as you become preoccupied with working projects and activities and meeting deadlines, a variety of files — including documents, spreadsheets, presentations, photos and videos, PDFs and even application executables — are commonly collected in various locations.
The end of the year is a smart time to tidy up the folder structures on your Mac and ensure files stored in incorrect directories — including your Desktop and Downloads folder but also the root directories of your Documents and iCloud directories — are moved to more appropriate permanent locations. Or, as reviewed within the previous couple of steps, these unneeded files can be deleted or archived.
Physically clean the Mac
While the previous steps all focused on addressing issues with the Mac’s contents, don’t underestimate the importance of physically cleaning your Mac. In addition to wiping the display, case and keyboard, employ canned air or a quality air duster (I use this model to avoid the continual expense of compressed air products) to keep a Mac’s fans and vents free of dust and debris that can lead to overheating and even intermittent system shutdowns.
Performing such a cleaning also helps you spot any potential issues — such as a loose key, a bulging case due to a malfunctioning battery not detected by diagnostics or a damaged trackpad — that may warrant further attention.

