- Finally, budget wireless earbuds that I wouldn't mind putting my AirPods away for
- I replaced my Linux system with this $200 Windows mini PC - and it left me impressed
- I recommend the Pixel 9 to most people looking to upgrade - especially while it's $250 off
- Google's viral research assistant just got its own app - here's how it can help you
- Sony will give you a free 55-inch 4K TV right now - but this is the last day to qualify
Building a ML Pipeline from Scratch with Kubeflow

The first blog in this series introduced you to how MLOPs can help you automate machine learning workflows.
In the second blog, you learned how you can build an automated ML pipeline with Kubeflow!
Is it an 8? Or 4? – in this blog post you will create the answer!
Getting to know MLOps with a digit recognizer application
The MNIST database of handwritten digits is the Hello-World of deep learning and therefore the best example to focus not on the ML model itself, but on creating the ML pipeline. The goal is to create an automated ML pipeline for getting the data, data pre-processing, and creating and serving the ML model. You can see an overview of the digits recognizer application below.
Digits Recognizer Application: Architecture Overview
General Overview
After setting up Kubeflow on your Kubernetes Cluster you have access to a Jupyter Notebook instances, where you (and your data science team) can explore the dataset and develop the first version of the ML model. In another Jupyter notebook, you can create the code for the Kubeflow pipeline, which is your ML pipeline. Depending on your needs, you can create your own workflow and add components. In the last pipeline component, you will define to create the model inference with Kserve. Finally, you can test your application and detect hand-written digit images. Be aware that you will need to be familiar with Kubernetes for the next steps!
Used components:
You can check out the walk-through in this Video:
1. Deploy a Kubernetes Cluster and install Kubeflow
First, install Kubeflow on your Kubernetes cluster. You can find more information in the Kubeflow docs.
You can check with kubectl if all pods are coming up successfully:

2. Access the Kubeflow Central Dashboard
Once you have everything deployed, you can do a port-forward with the following command and access the Kubeflow Central Dashboard remotely at http://localhost:8080.
kubectl port-forward svc/istio-ingressgateway -n istio-system 8080:80
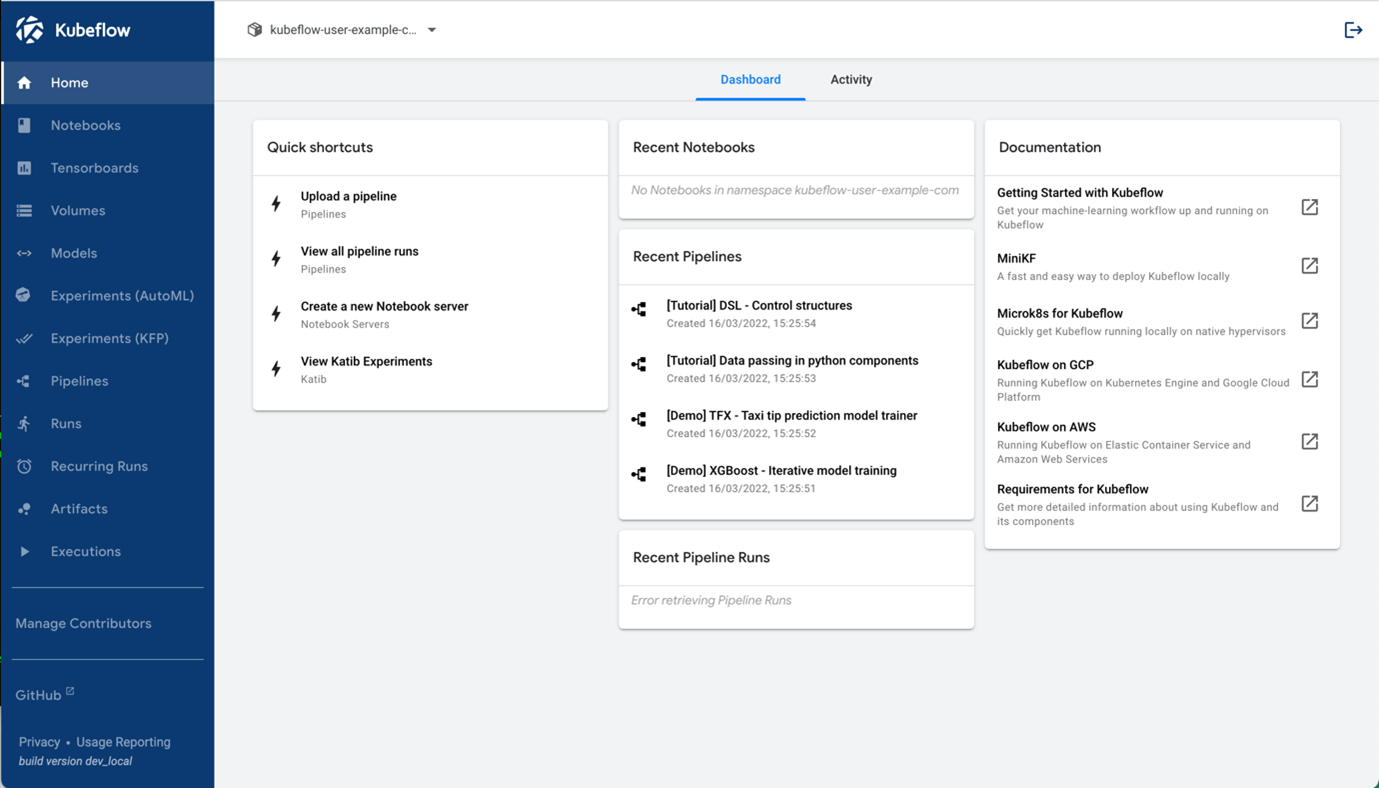
 Kubeflow 1.5 Dashboard
3. Setup Jupyter Notebooks
Jupyter Notebooks is an important part of Kubeflow where you can run and edit your Python code.
3.a Allow access to Kubeflow Pipelines from Jupyter Notebooks
In this demo you will access the Kubeflow Pipeline via the Python SDK from a Jupyter notebook. Therefore, one additional setting is required to allow this.
At first insert your Kubeflow username in this Kubernetes manifest (your Kubeflow username is also the name of a Kubernetes namespace where all your user-specific containers will be spun up): kubeflow_config/access_kfp_from_jupyter_notebook.yaml. You can the extract namespace name under the Manage Contributers menu. You can find this YAML-file in the Github repository mentioned under the used components.
Once done, apply it with this command:
kubectl apply -f access_kfp_from_jupyter_notebook.yaml
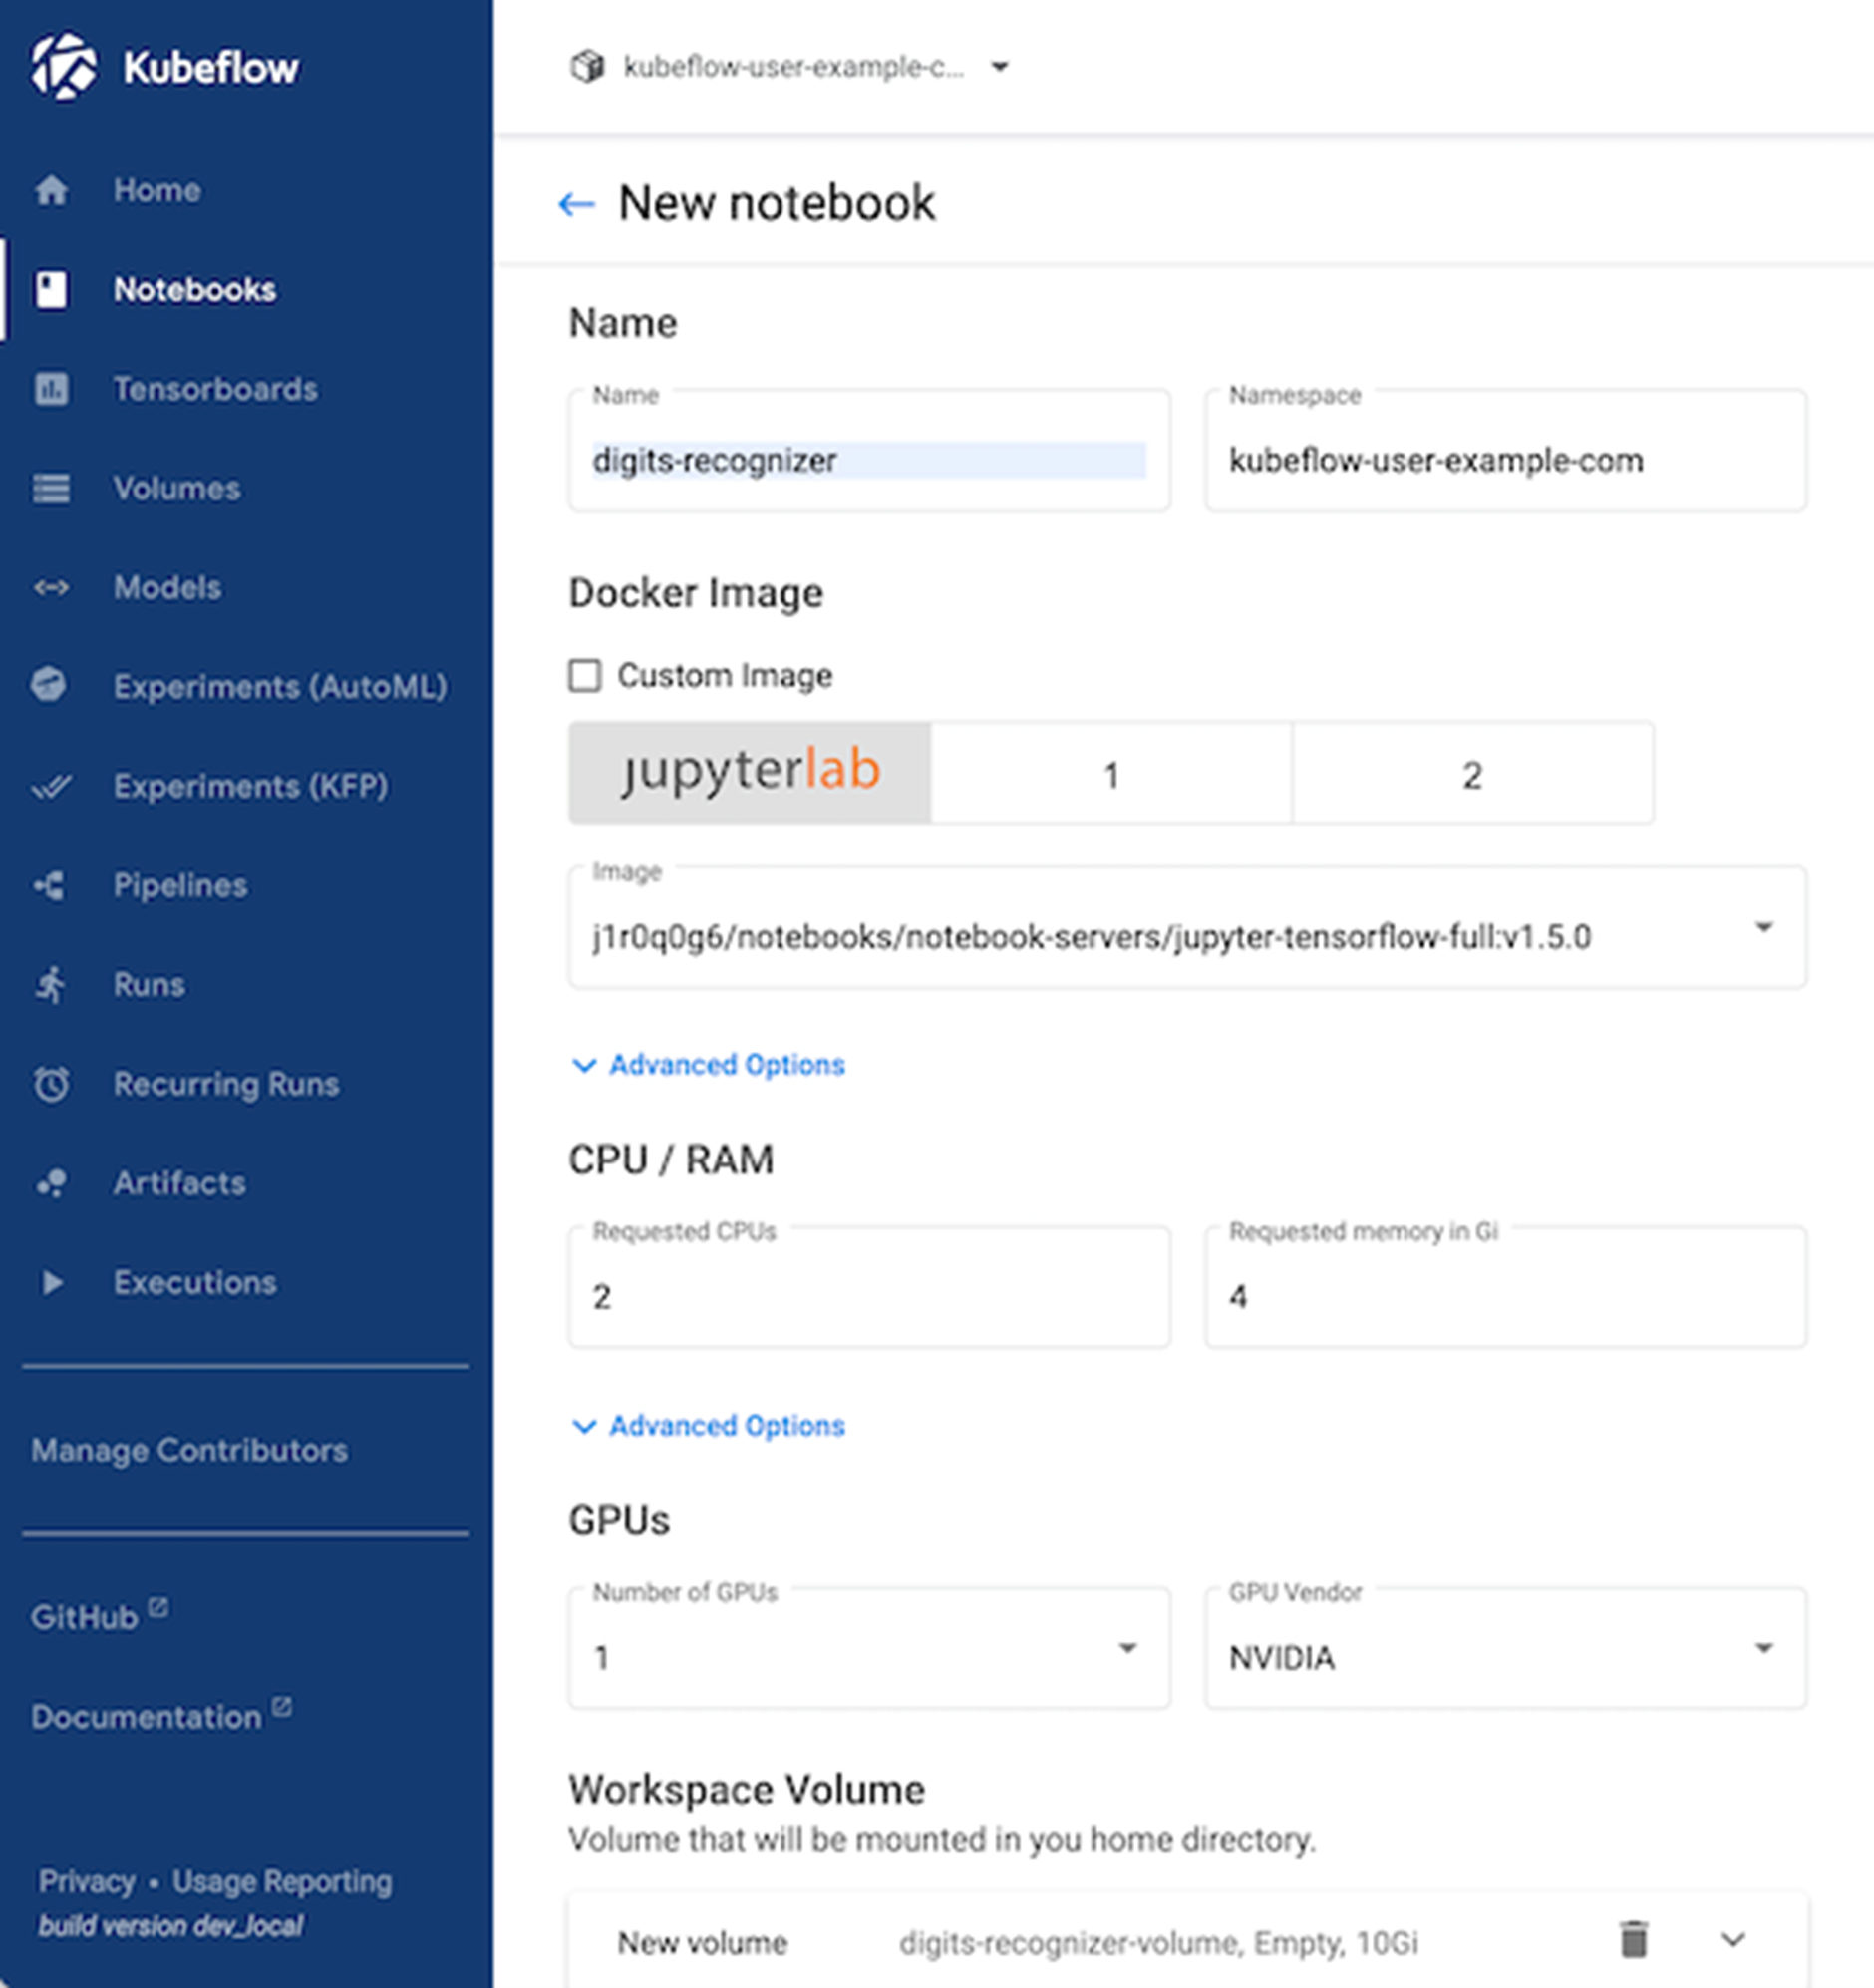
3.b Spinning up a new Notebook Instance
Now, you need to spin a up new Jupyter notebook instance. For the container image select jupyter-tensorflow-full:v1.5.0. This can take several minutes depending on your download speed.

Don’t forget to enable this configuration:

3.c. Update Python Packages
Once started, double check if the latest versions of the Kubeflow python packages are installed within the Jupyter notebook container. If not, you need to update them via pip install.
pip list should list versions above these:
kfp 1.8.12
kfp-pipeline-spec 0.1.13
kfp-server-api 1.8.2
kserve 0.8.0
3.d. Access Jupyter Notebooks & Cloning the code from Github
Go to Notebooks and click on CONNECT to start the Jupyter Notebook container.
With Juypter Lab you have access to a terminal and Python notebook in your web browser. This is where your data science team and you can collaborate on exploring that dataset and also create your Kubeflow Pipeline.
At first, let’s clone this repository so you have access to the code. You can use the terminal or directly do that in the browser.
git clone https://github.com/flopach/digits-recognizer-kubeflow-intersight
Then open digits_recognizer_notebook.ipynb to get a feeling of the dataset and its format.
4. Setup MinIO for Object Storage
In order to provide a single source of truth where all your working data (training and testing data, saved ML models etc.) is available to all your components, using an object storage is a recommended way. For our app, we will setup MinIO.
Since Kubeflow has already setup a MinIO tenant, we will leverage the mlpipeline bucket. But you can also deploy your own MinIO tenant.
Get credentials from Kubeflow’s integrated MinIO
Obtain the accesskey and secretkey for MinIO with these commands:
kubectl get secret mlpipeline-minio-artifact -n kubeflow -o jsonpath="{.data.accesskey}" | base64 –decode
kubectl get secret mlpipeline-minio-artifact -n kubeflow -o jsonpath="{.data.secretkey}" | base64 –decode
In order to get access to MinIO from outside of your Kubernetes cluster and check the bucket, do a port-forward:
kubectl port-forward -n kubeflow svc/minio-service 9000:9000
Then you can access the MinIO dashboard at http://localhost:9000 and check the bucket name or create your own bucket. Alternatively, you can use the MinIO CLI Client
Default values should be (already in the code and no action on your end):
- accesskey: minio
- secretkey: minio123
- bucket: mlpipeline
5. Setting up Kserve
In this step we are setting up Kserve for model inference serving. The Kserve ML inference container will be created when we are executing our ML pipeline which will happen in the next step.
Set minIO secret for kserve
We need to apply this yaml file so that the created model which is saved on minIO can be accessed by Kserve. Kserve will copy the saved model in the newly created inference container.
kubectl apply -f kubeflow_configs/set-minio-kserve-secret.yaml
6. Create a ML pipeline with Kubeflow Pipelines
Kubeflow Pipelines (KFP) is the most used component of Kubeflow. It allows you to create for every step in your ML project a reusable containerized pipeline component which can be chained together as a ML pipeline.
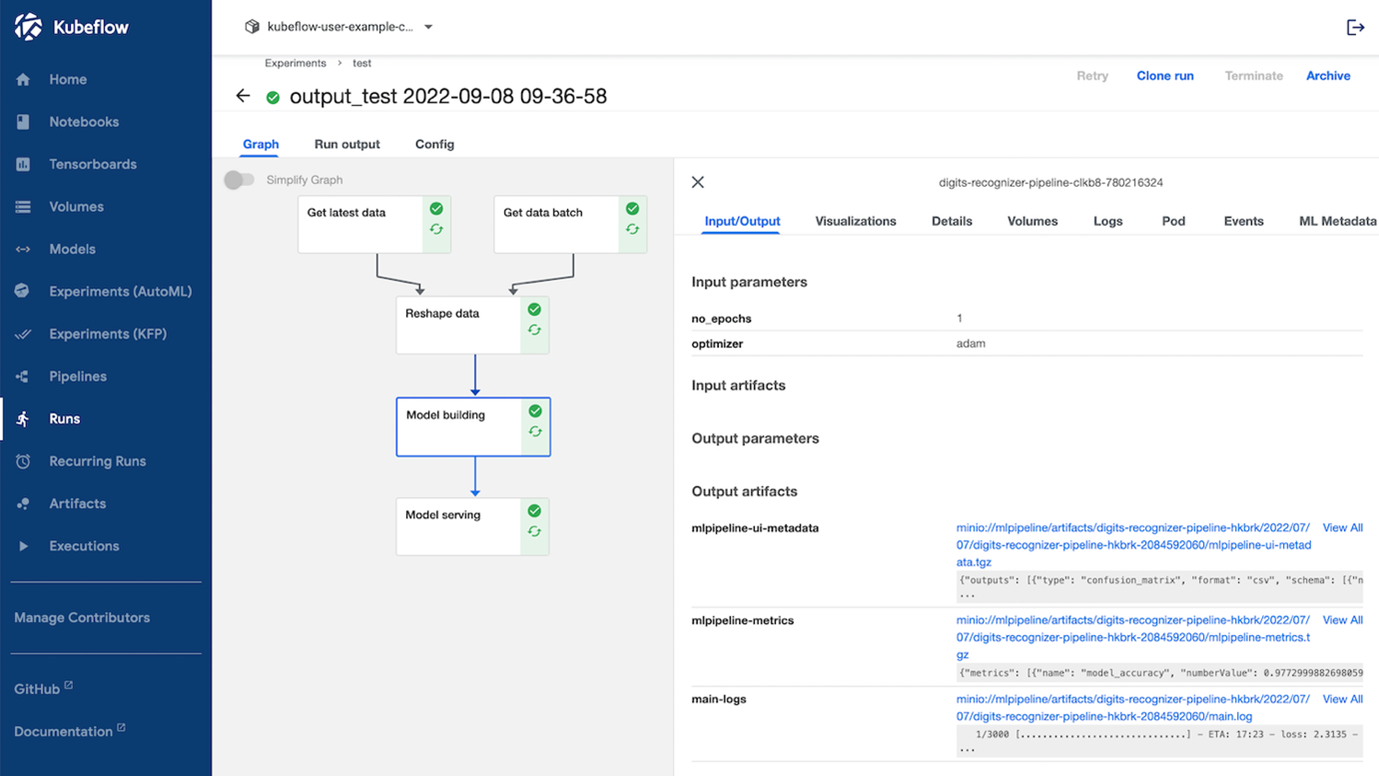
For the digits recognizer application, the pipeline is already created with the Python SDK. You can find the code in the file digits_recognizer_pipeline.ipynb. This code will create the pipeline as seen below:
 Created Kubeflow pipeline using the Python SDK
 The last step of the Kubeflow pipeline creates a Kserve ML inference service
7. Test the model inference
Now you can test the model inference. The simplest way is to use a Python script directly in the Jupyter Notebook:

Alternatively, you can use the web application which you can find in the web_app folder. Be aware that some configuration needs to be done if you want to access the inference service from outside of the cluster.
Key Learning Points
- You just did your first steps in MLOps – creating an automated pipeline with Kubeflow where data will be fed in the pipeline and as an output a ML inference service will be created.
- When using Kubeflow you or someone from your team need solid Kubernetes skills.
- You got to know the various components of Kubeflow and how they work together.
Stay tuned for the next part of the MLOps blog series where we will cover ML model monitoring in more detail!
Related resources
We’d love to hear what you think. Ask a question or leave a comment below.
And stay connected with Cisco DevNet on social!
LinkedIn | Twitter @CiscoDevNet | Facebook | YouTube Channel
Share:

