- I recommend the Pixel 9 to most people looking to upgrade - especially while it's $250 off
- Google's viral research assistant just got its own app - here's how it can help you
- Sony will give you a free 55-inch 4K TV right now - but this is the last day to qualify
- I've used virtually every Linux distro, but this one has a fresh perspective
- The 7 gadgets I never travel without (and why they make such a big difference)
Enable No-Code Kubernetes with the harpoon Docker Extension | Docker
(This post is co-written by Dominic Holt, Founder & CEO of harpoon.)
Kubernetes has been a game-changer for ensuring scalable, high availability container orchestration in the Software, DevOps, and Cloud Native ecosystems. While the value is great, it doesn’t come for free. Significant effort goes into learning Kubernetes and all the underlying infrastructure and configuration necessary to power it. Still more effort goes into getting a cluster up and running that’s configured for production with automated scalability, security, and cluster maintenance.
All told, Kubernetes can take an incredible amount of effort, and you may end up wondering if there’s an easier way to get all the value without all the work.
Meet harpoon
With harpoon, anyone can provision a Kubernetes cluster and deploy their software to the cloud without writing code or configuration. Get your software up and running in seconds with a drag and drop interface. When it comes to monitoring and updating your software, harpoon handles that in real-time to make sure everything runs flawlessly. You’ll be notified if there’s a problem, and harpoon can re-deploy or roll back your software to ensure a seamless experience for your end users. harpoon does this dynamically for any software — not just a small, curated list.
To run your software on Kubernetes in the cloud, just enter your credentials and click the start button. In a few minutes, your production environment will be fully running with security baked in. Adding any software is as simple as searching for it and dragging it onto the screen. Want to add your own software? Connect your GitHub account with only a couple clicks and choose which repository to build and deploy in seconds with no code or complicated configurations.
harpoon enables you to do everything you need, like logging and monitoring, scaling clusters, creating services and ingress, and caching data in seconds with no code. harpoon makes DevOps attainable for anyone, leveling the playing field by delivering your software to your customers at the same speed as the largest and most technologically advanced companies at a fraction of the cost.
The architecture of harpoon
harpoon works in a hybrid SaaS model and runs on top of Kubernetes itself, which hosts the various microservices and components that form the harpoon enterprise platform. This is what you interface with when you’re dragging and dropping your way to nirvana. By providing cloud service provider credentials to an account owned by you or your organization, harpoon uses terraform to provision all of the underlying virtual infrastructure in your account, including your own Kubernetes cluster. In this way, you have complete control over all of your infrastructure and clusters.

Once fully provisioned, harpoon’s UI can send commands to various harpoon microservices in order to communicate with your cluster and create Kubernetes deployments, services, configmaps, ingress, and other key constructs.
If the cloud’s not for you, we also offer a fully on-prem, air-gapped version of harpoon that can be deployed essentially anywhere.
Why harpoon?
Building production software environments is hard, time-consuming, and costly, with average costs to maintain often starting at $200K for an experienced DevOps engineer and going up into the tens of millions for larger clusters and teams. Using harpoon instead of writing custom scripts can save hundreds of thousands of dollars per year in labor costs for small companies and millions per year for mid to large size businesses
Using harpoon will enable your team to have one of the highest quality production environments available in mere minutes. Without writing any code, harpoon automatically sets up your production environment in a secure environment and enables you to dynamically maintain your cluster without any YAML or Kubernetes expertise. Better yet, harpoon is fun to use. You shouldn’t have to worry about what underlying technologies are deploying your software to the cloud. It should just work. And making it work should be simple.
Why run harpoon as a Docker Extension?
Docker Extensions help you build and integrate software applications into your daily workflows. With the harpoon Docker Extension, you can simplify the deployment process with drag and drop, visually deploying and configuring your applications directly into your Kubernetes environment. Currently, the harpoon extension for Docker Desktop supports the following features:
- Link harpoon to a cloud service provider like AWS and deploy a Kubernetes cluster and the underlying virtual infrastructure.
- Easily accomplish simple or complex enterprise-grade cloud deployments without writing any code or configuration scripts.
- Connect your source code repository and set up an automated deployment pipeline without any code in seconds.
- Supercharge your DevOps team with real-time visual cues to check the health and status of your software as it runs in the cloud.
- Drag and drop container images from Docker Hub, source, or private container registries
- Manage your K8s cluster with visual pods, ingress, volumes, configmaps, secrets, and nodes.
- Dynamically manipulate routing in a service mesh with only simple clicks and port numbers.
How to use the harpoon Docker Extension
Prerequisites: Docker Desktop 4.8 or later
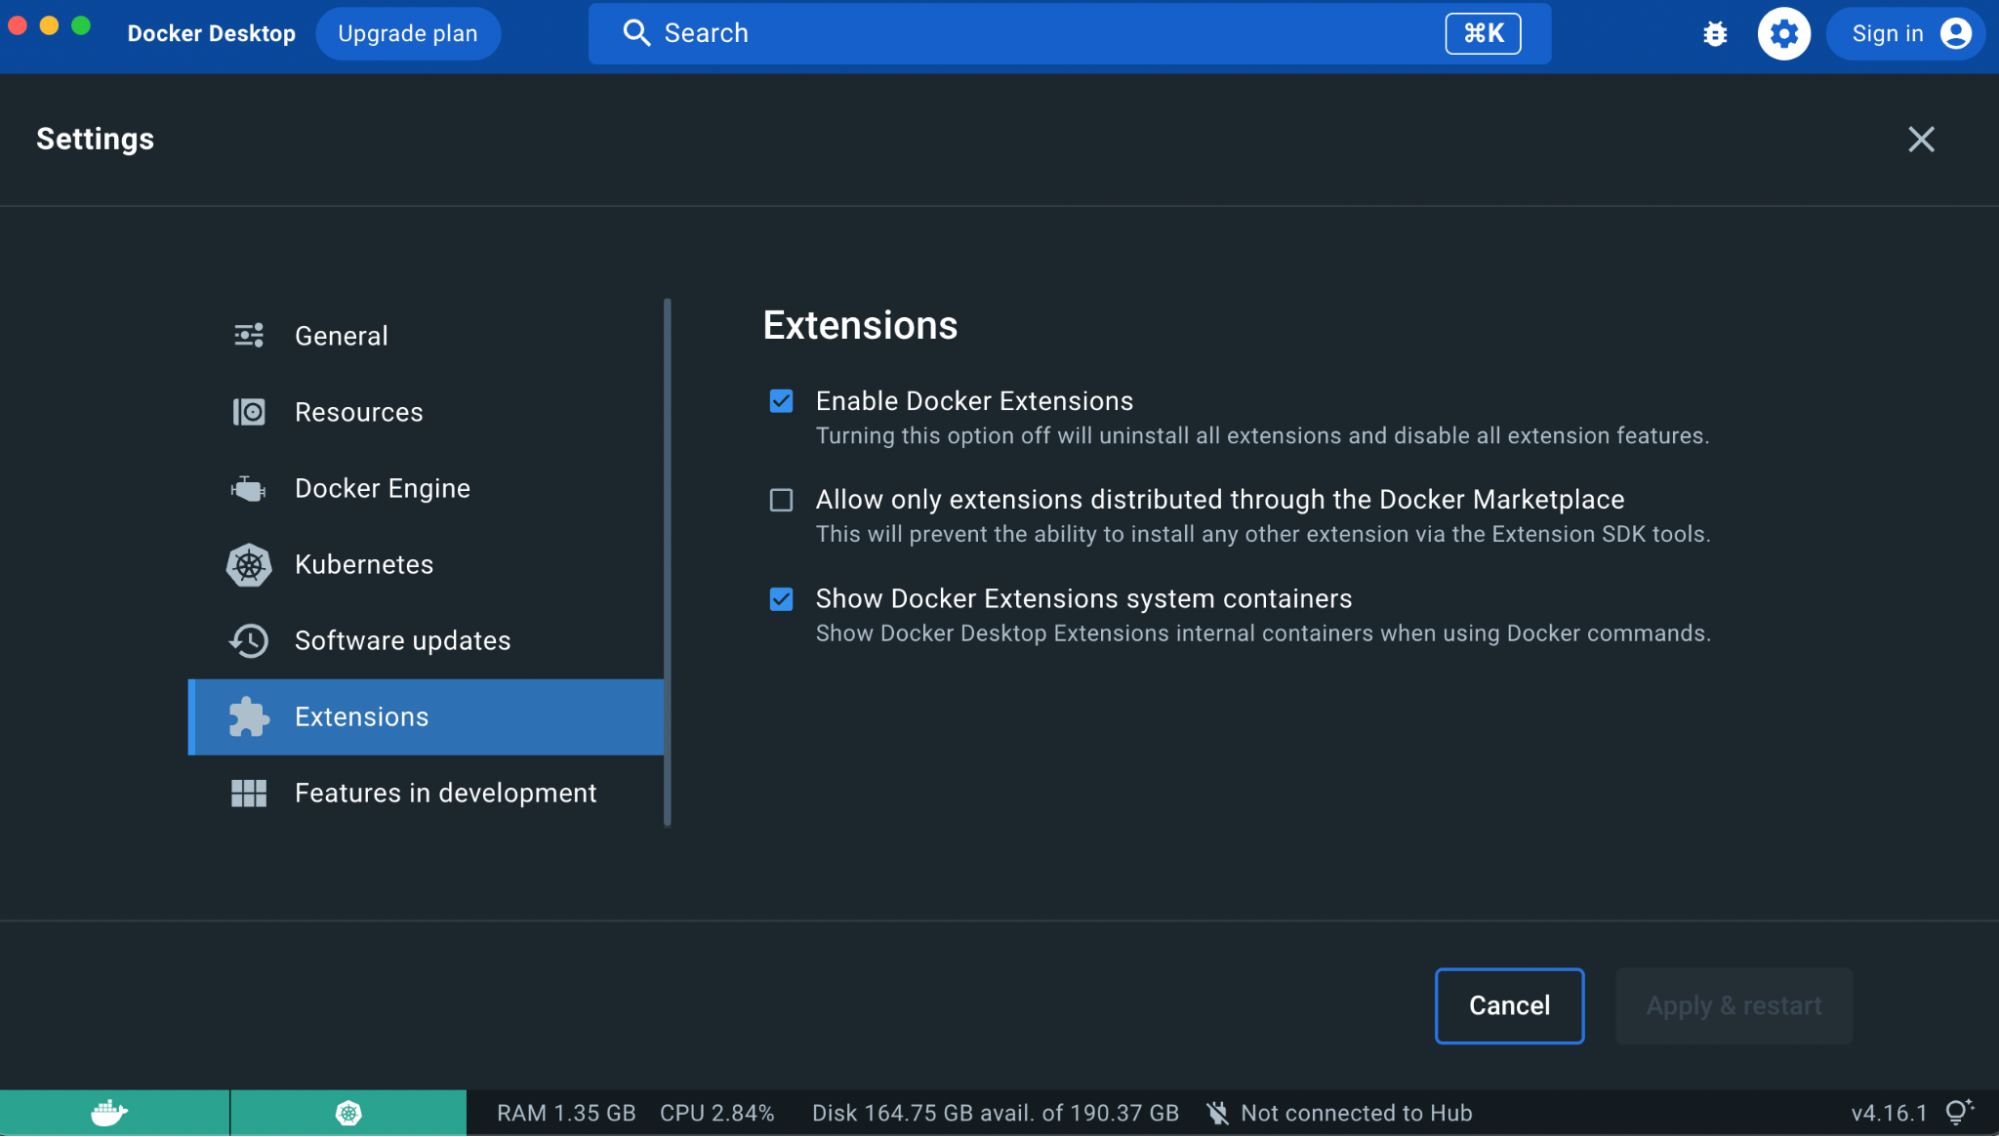
Step 1: Enable Docker Extensions
You’ll need to enable Docker Extensions under the Settings tab in Docker Desktop
Hop into Docker Desktop and confirm that the Docker Extensions feature is enabled. Go to Settings > Extensions > and check the “Enable Docker Extensions” box.
Step 2: Install the harpoon Docker Extension
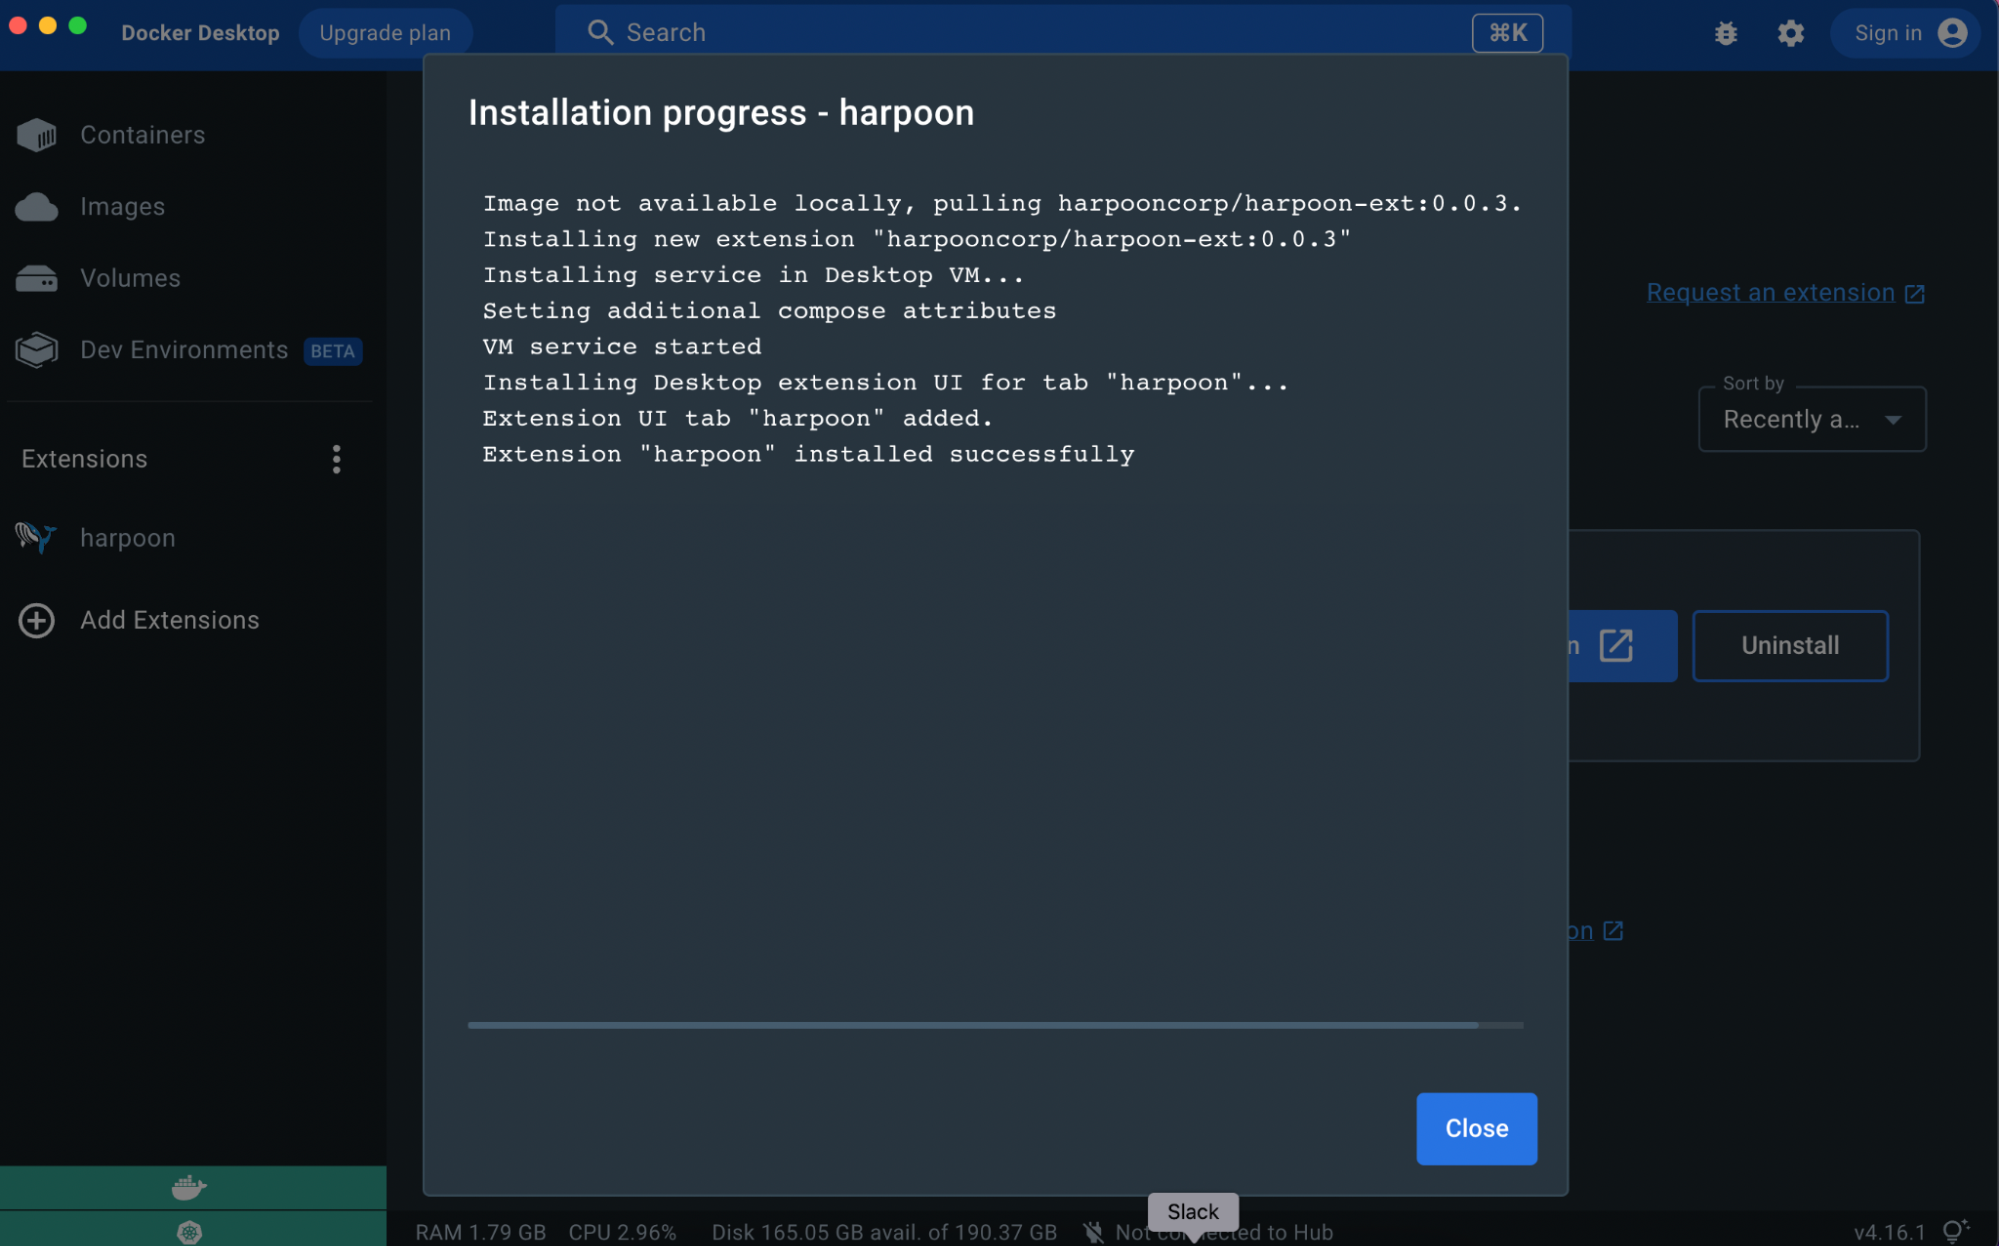
The harpoon extension is available on the Extensions Marketplace in Docker Desktop and on Docker Hub. To get started, search for harpoon in the Extensions Marketplace, then select Install.
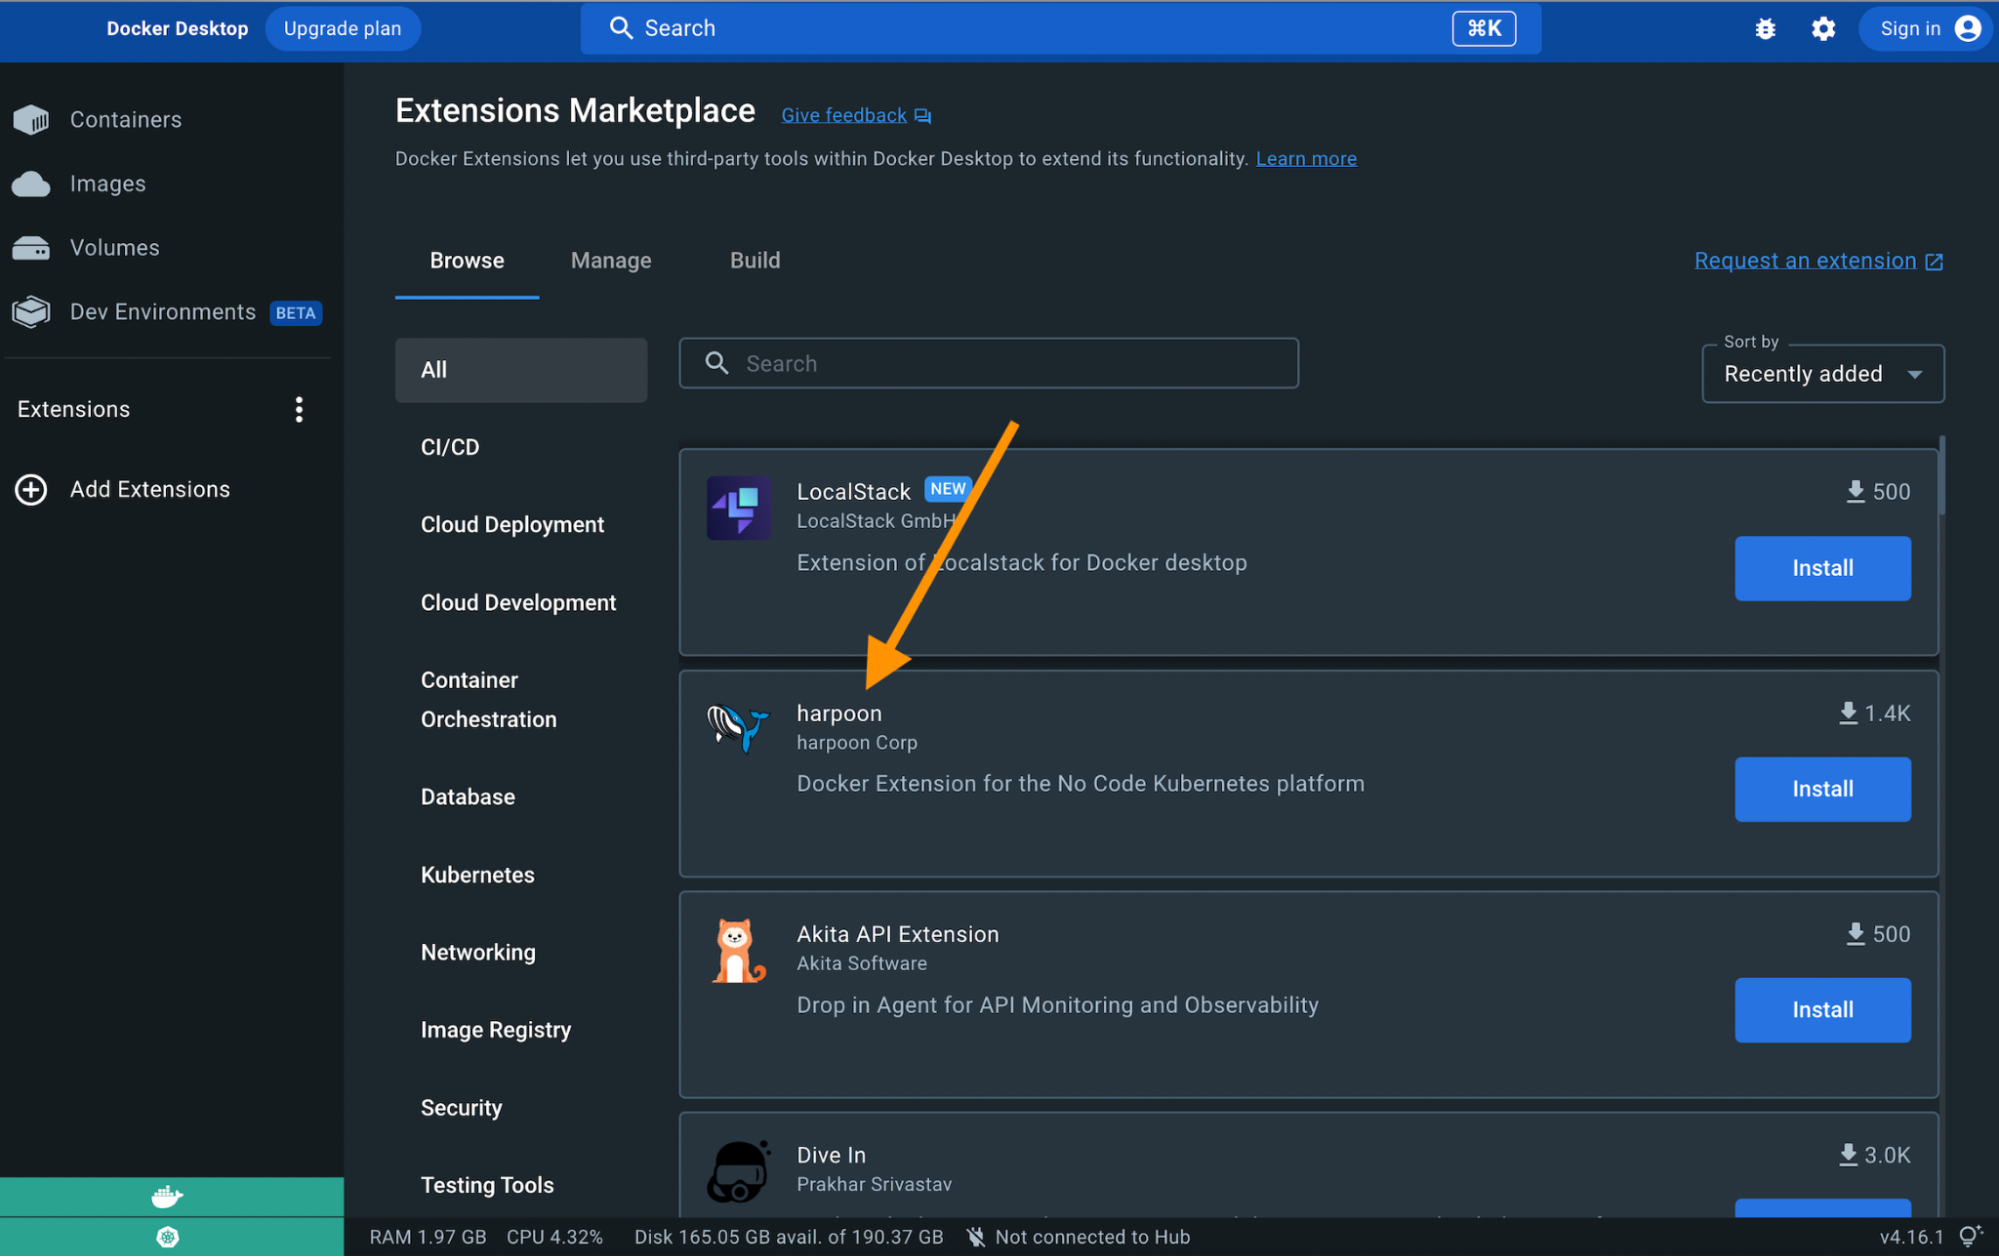
This will download and install the latest version of the harpoon Docker Extension from Docker Hub.
Step 3: Register with harpoon
If you’re new to harpoon, then you might need to register by clicking the Register button. Otherwise, you can use your credentials to log in.
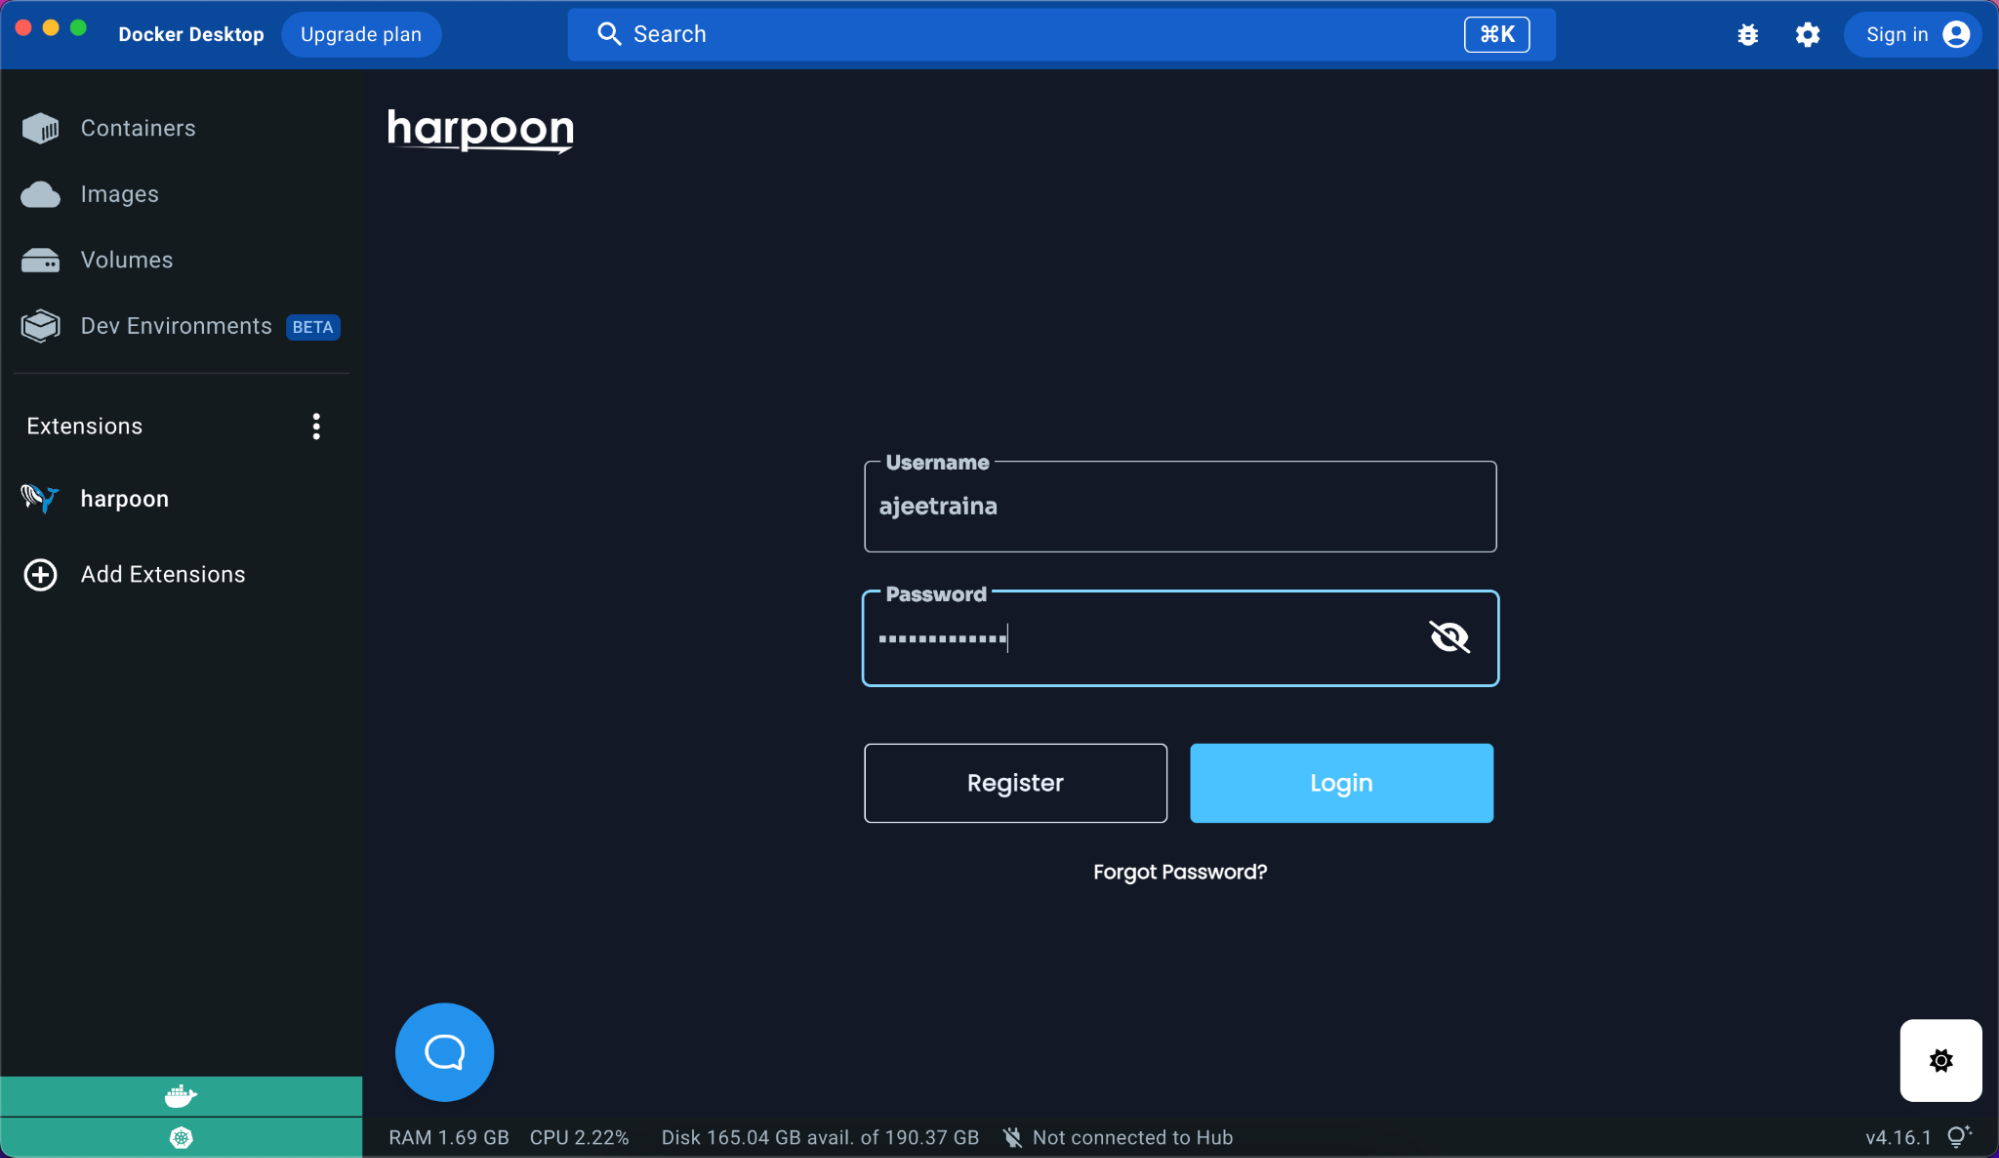
Step 4: Link your AWS Account
While you can drag out any software or Kubernetes components you like, if you want to do actual deployments, you will first need to link your cloud service provider account. At the moment, harpoon supports Amazon Web Services (AWS). Over time, we’ll be supporting all of the major cloud service providers.
If you want to deploy software on top of AWS, you will need to provide harpoon with an access key ID and a secret access key. Since harpoon is deploying all of the necessary infrastructure in AWS in addition to the Kubernetes cluster, we require fairly extensive access to the account in order to successfully provision the environment. Your keys are only used for provisioning the necessary infrastructure to stand up Kubernetes in your account and to scale up/down your cluster as you designate. We take security very seriously at harpoon, and aside from using an extensive and layered security approach for harpoon itself, we use both disk and field level encryption for any sensitive data.
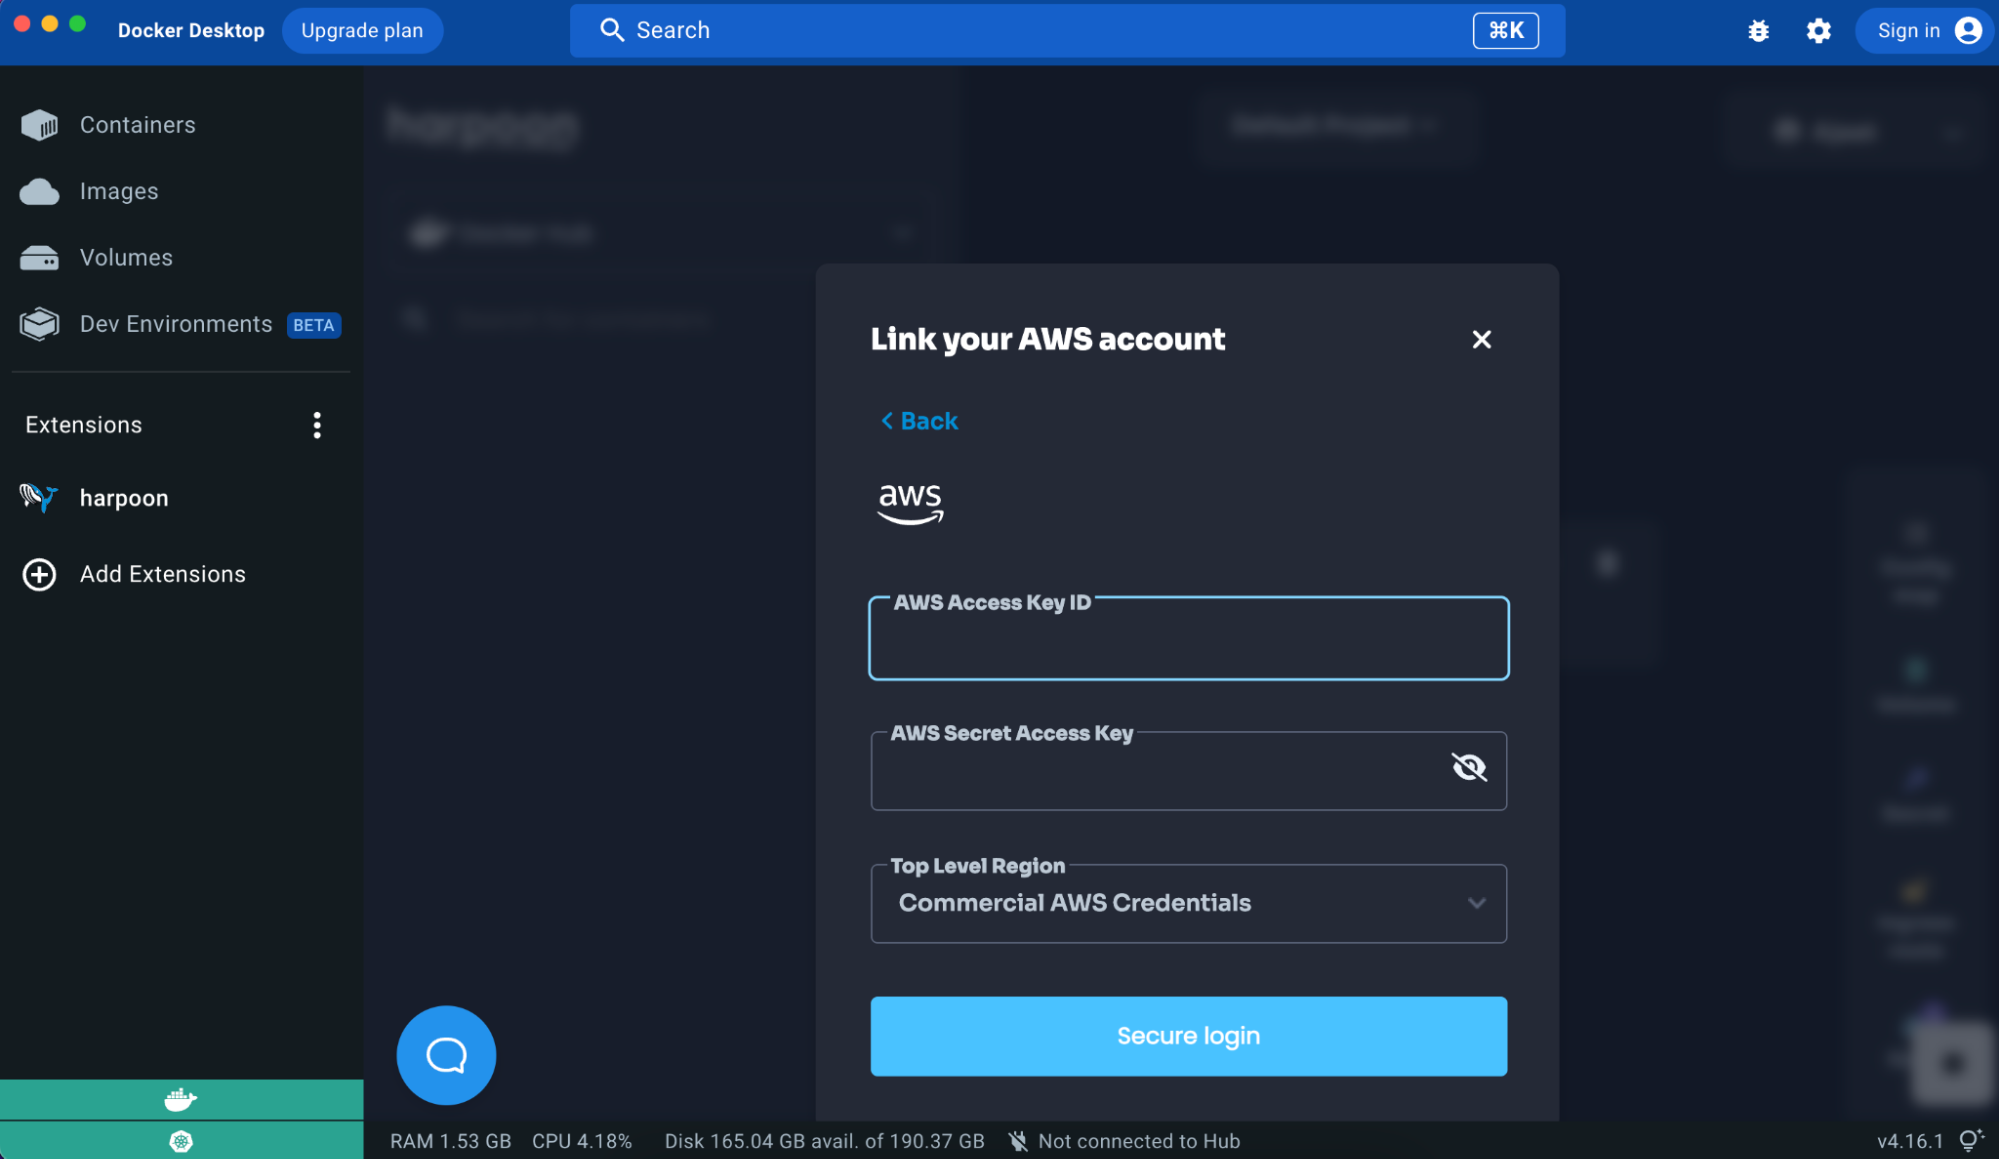
The following are the specific permissions harpoon needs to successfully deploy a cluster:
- AmazonRDSFullAccess
- IAMFullAccess
- AmazonEC2FullAccess
- AmazonVPCFullAccess
- AmazonS3FullAccess
- AWSKeyManagementServicePowerUser
Step 5: Start the cluster
Once you’ve linked your cloud service provider account, you just click the “Start” button on the cloud/node element in the workspace. That’s it. No, really! The cloud/node element will turn yellow and provide a countdown. While your experience may vary a bit, we tend to find that you can get a cluster up in under 6 minutes. When the cluster is running, the cloud will return and the element will glow a happy blue color.
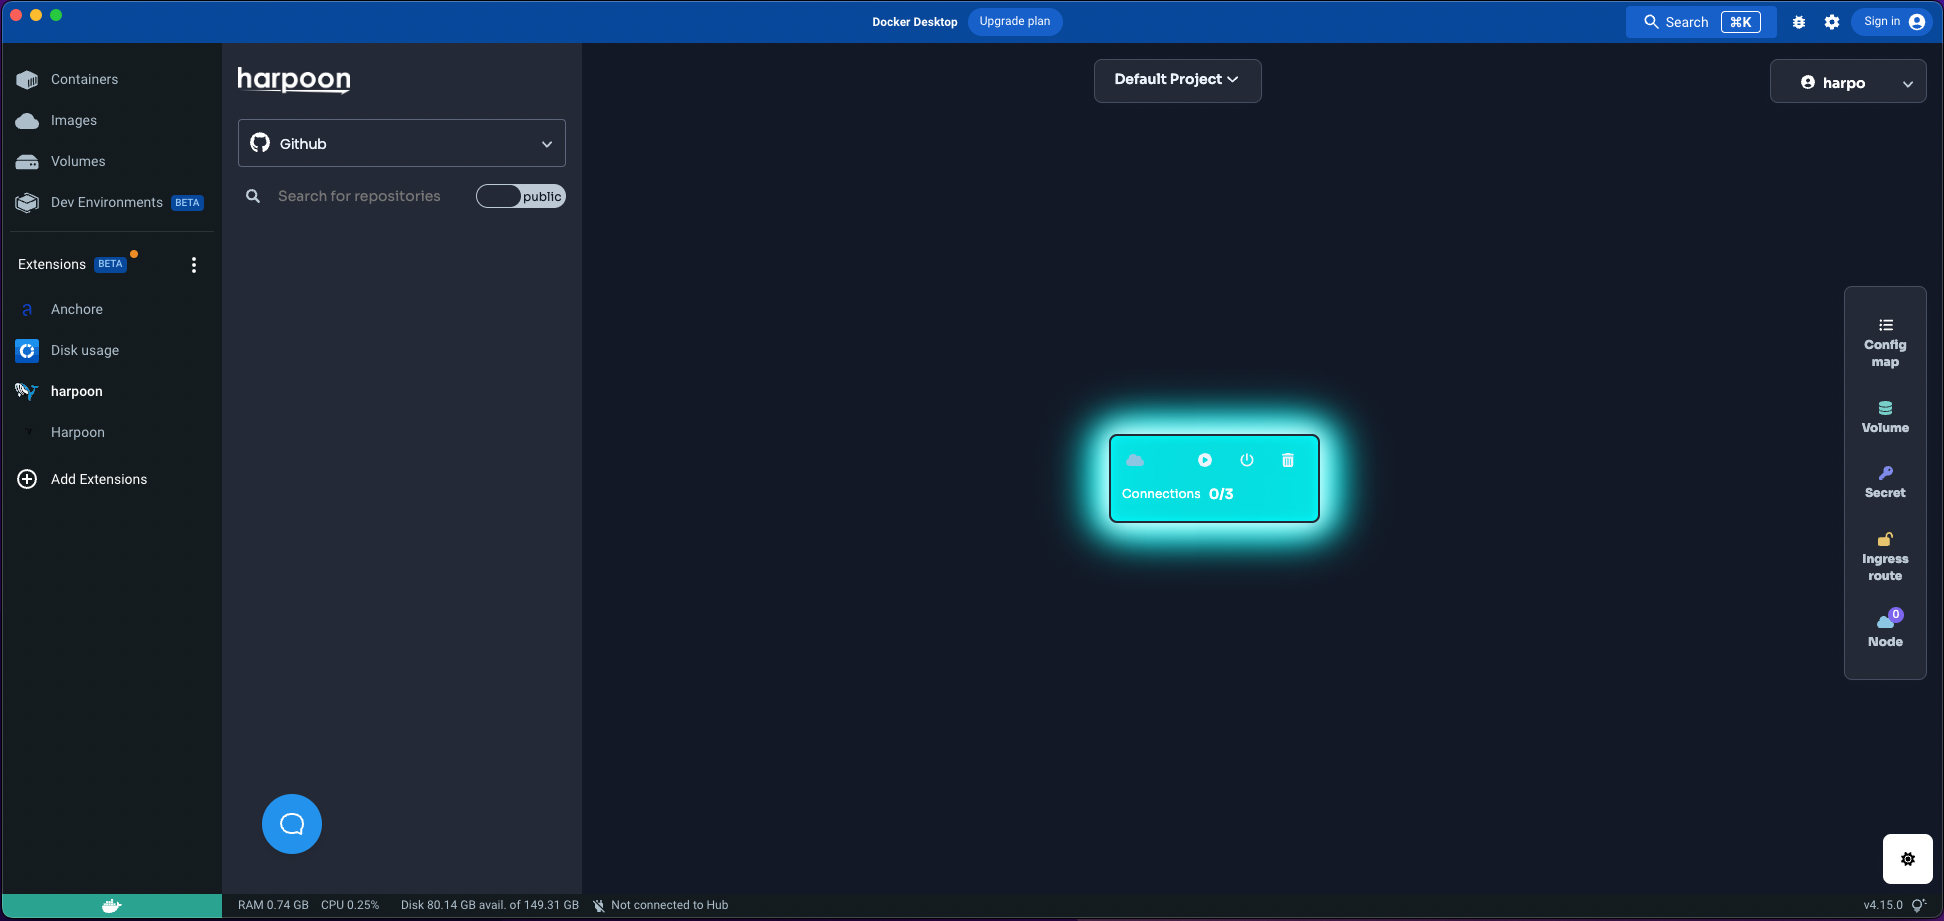
Step 6: Deployment
You can search for any container image you’d like from Docker Hub, or link your GitHub account to search any GitHub repository (public or private) to deploy with harpoon. You can drag any search result over to the workspace for a visual representation of the software.
Deploying containers is as easy as hitting the “Deploy” button. Github containers will require you to build the repository first. In order for harpoon to successfully build a GitHub repository, we currently require the repository to have a top-level Dockerfile, which is industry best practice. If the Dockerfile is there, once you click the “Build” button, harpoon will automatically find it and build a container image. After a successful build, the “Deploy” button will become enabled and you can deploy the software directly.
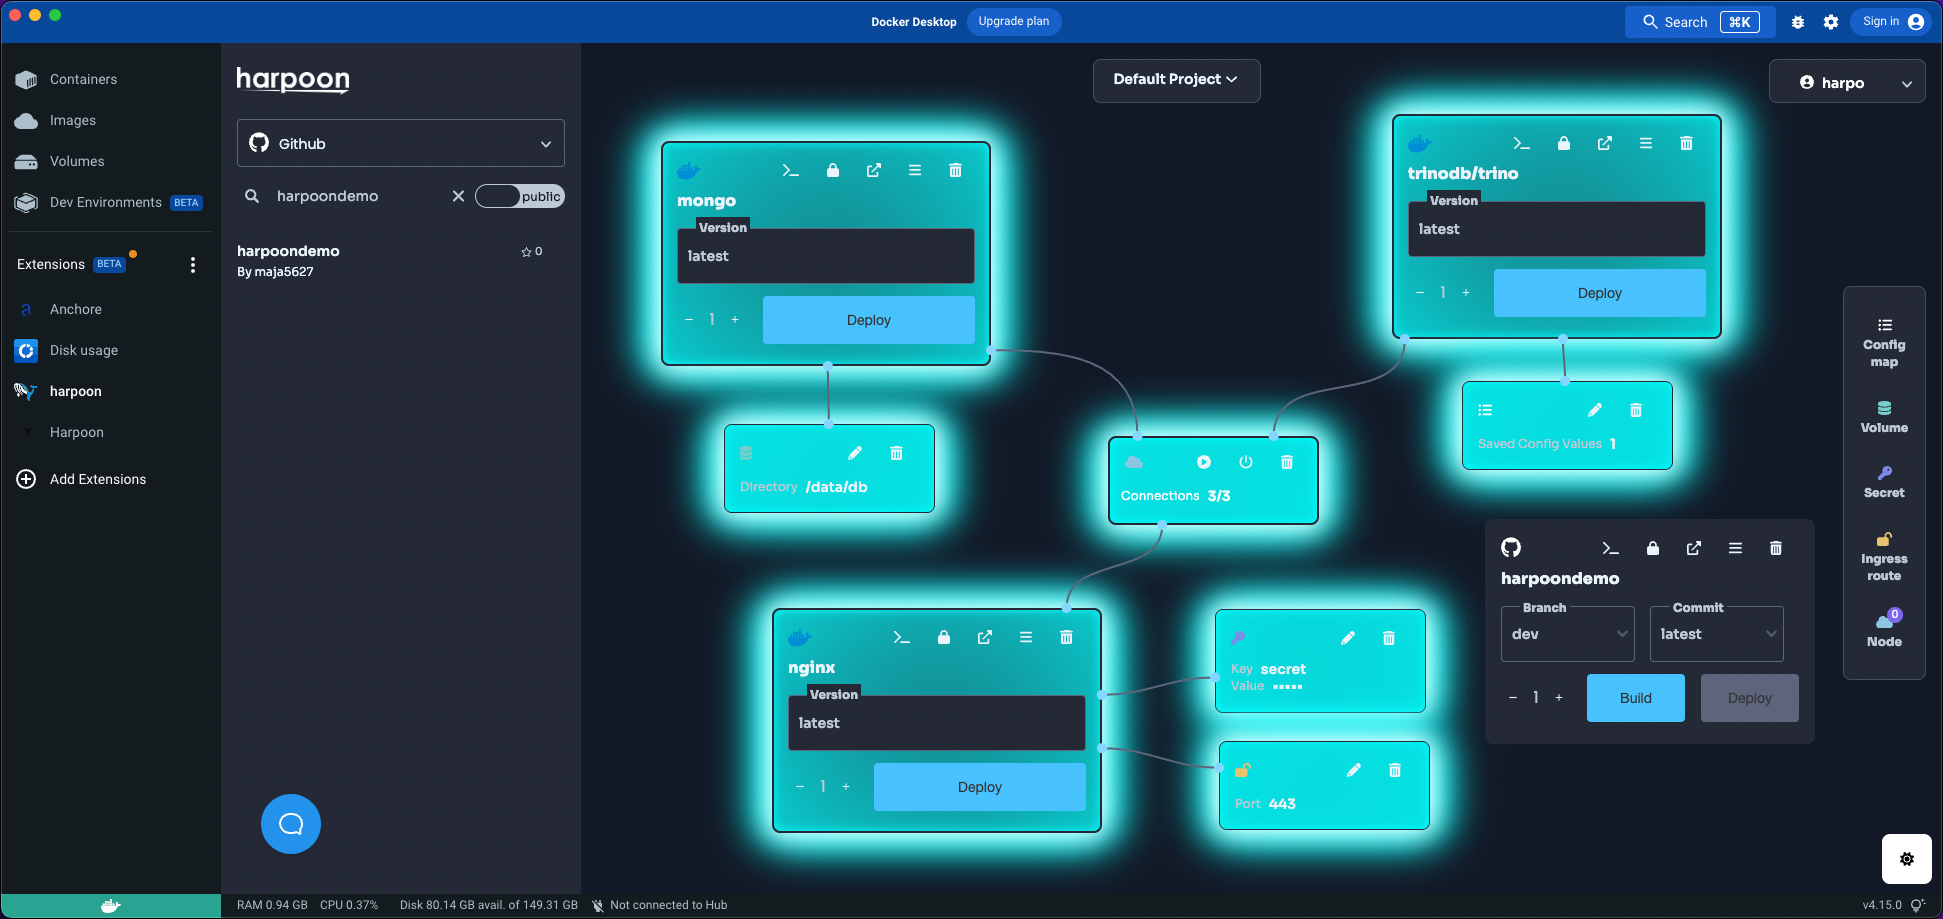
Once you have a deployment, you can attach any Kubernetes element to it, including ingress, configmaps, secrets, and persistent volume claims.
You can find more info here if you need help: https://docs.harpoon.io/en/latest/usage.html
Next steps
The harpoon Docker Extension makes it easy to provision and manage your Kubernetes clusters. You can visually deploy your software to Kubernetes and configure it without writing code or configuration. By integrating directly with Docker Desktop, we hope to make it easy for DevOps teams to dynamically start and maintain their cluster without any YAML, helm chart, or Kubernetes expertise.
Check out the harpoon Docker Extension for yourself!

