- Don't sleep on this TCL TV in 2025: This new Mini LED model gives OLED a close fight
- I wore Whoop's latest health tracker - it gave me the best of Oura Ring, Apple Watch, and more
- I've yet to find a Lenovo laptop that delivers more power, battery, and comfort than this
- If you own an AirTag, you need these accessories to maximize its potential
- LockBit Ransomware Gang Breached, Secrets Exposed
How to Setup Your Local Node.js Dev Environment Using Docker

Docker is the de facto toolset for building modern applications and setting up a CI/CD pipeline – helping you build, ship, and run your applications in containers on-prem and in the cloud.
Whether you’re running on simple compute instances such as AWS EC2 or something fancier like a hosted Kubernetes service, Docker’s toolset is your new BFF.
But what about your local Node.js development environment? Setting up local dev environments while also juggling the hurdles of onboarding can be frustrating, to say the least.
While there’s no silver bullet, with the help of Docker and its toolset, we can make things a whole lot easier.
Table of contents:
How to set up a local Node.js dev environment — Part 1

In this tutorial, we’ll walk through setting up a local Node.js development environment for a relatively complex application that uses React for its front end, Node and Express for a couple of micro-services, and MongoDb for our datastore. We’ll use Docker to build our images and Docker Compose to make everything a whole lot easier.
If you have any questions, comments, or just want to connect. You can reach me in our Community Slack or on Twitter at @rumpl.
Let’s get started.
Prerequisites
To complete this tutorial, you will need:
- Docker installed on your development machine. You can download and install Docker Desktop.
- Sign-up for a Docker ID through Docker Hub.
- Git installed on your development machine.
- An IDE or text editor to use for editing files. I would recommend VSCode.
Step 1: Fork the Code Repository
The first thing we want to do is download the code to our local development machine. Let’s do this using the following git command:
git clone https://github.com/rumpl/memphis.git
Now that we have the code local, let’s take a look at the project structure. Open the code in your favorite IDE and expand the root level directories. You’ll see the following file structure.
├── docker-compose.yml
├── notes-service
├── reading-list-service
├── users-service
└── yoda-ui
The application is made up of a couple of simple microservices and a front-end written in React.js. It also uses MongoDB as its datastore.
Typically at this point, we would start a local version of MongoDB or look through the project to find where our applications will be looking for MongoDB. Then, we would start each of our microservices independently and start the UI in hopes that the default configuration works.
However, this can be very complicated and frustrating. Especially if our microservices are using different versions of Node.js and configured differently.
Instead, let’s walk through making this process easier by dockerizing our application and putting our database into a container.
Step 2: Dockerize your applications
Docker is a great way to provide consistent development environments. It will allow us to run each of our services and UI in a container. We’ll also set up things so that we can develop locally and start our dependencies with one docker command.
The first thing we want to do is dockerize each of our applications. Let’s start with the microservices because they are all written in Node.js, and we’ll be able to use the same Dockerfile.
Creating Dockerfiles
Create a Dockerfile in the notes-services directory and add the following commands.


This is a very basic Dockerfile to use with Node.js. If you are not familiar with the commands, you can start with our getting started guide. Also, take a look at our reference documentation.
Building Docker Images
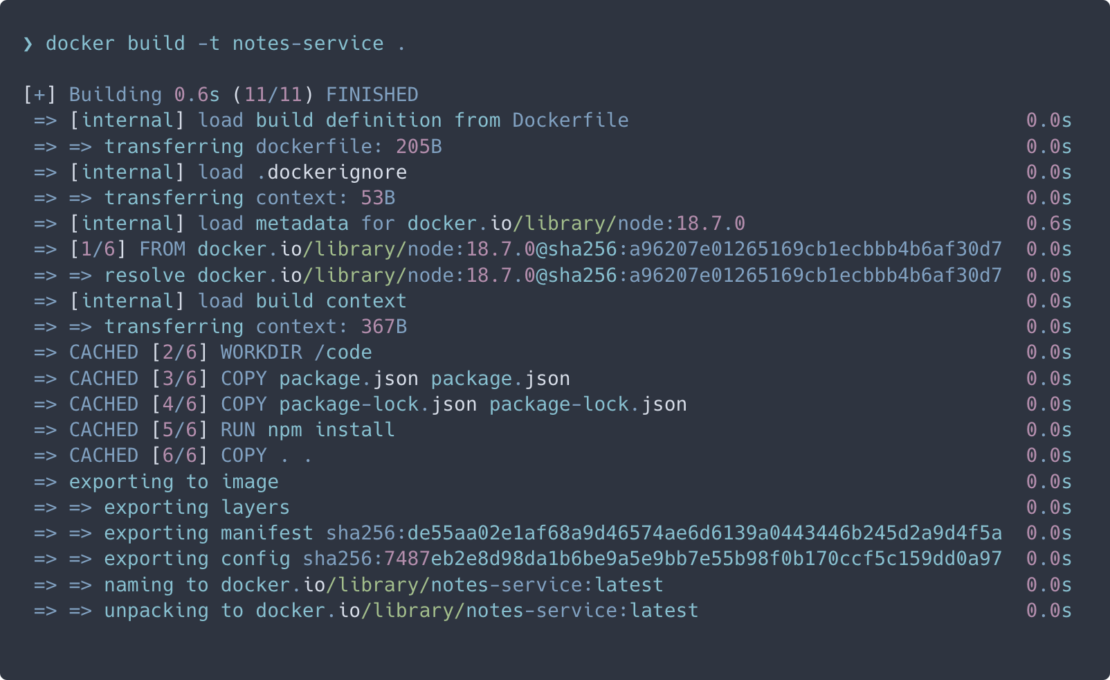
Now that we’ve created our Dockerfile, let’s build our image. Make sure you’re still located in the notes-services directory and run the following command:
cd notes-service
docker build -t notes-service .


Now that we have our image built, let’s run it as a container and test that it’s working.
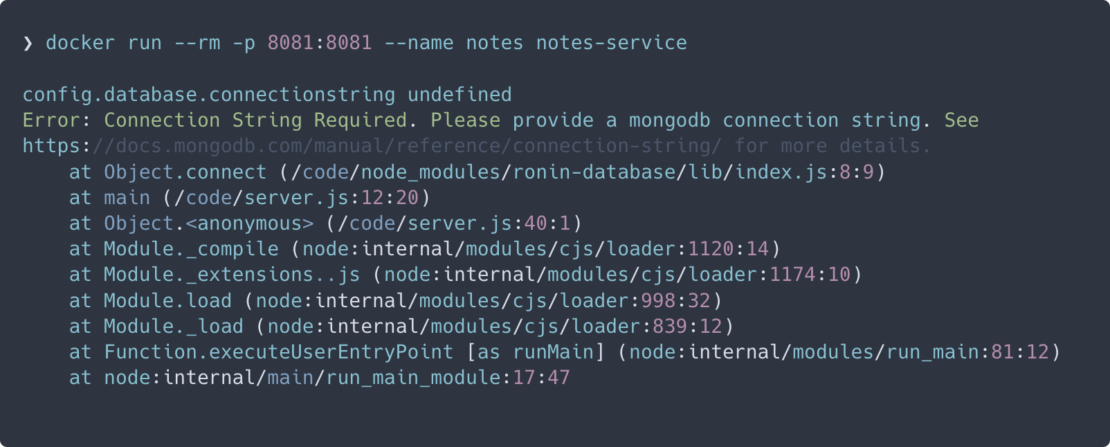
docker run --rm -p 8081:8081 --name notes notes-service


From this error, we can see we’re having trouble connecting to the mongodb. Two things are broken at this point:
- We didn’t provide a connection string to the application.
- We don’t have MongoDB running locally.
To resolve this, we could provide a connection string to a shared instance of our database, but we want to be able to manage our database locally and not have to worry about messing up our colleagues’ data they might be using to develop.
Step 3: Run MongoDB in a localized container
Instead of downloading MongoDB, installing, configuring, and then running the Mongo database service. We can use the Docker Official Image for MongoDB and run it in a container.
Before we run MongoDB in a container, we want to create a couple of volumes that Docker can manage to store our persistent data and configuration. I like to use the managed volumes that Docker provides instead of using bind mounts. You can read all about volumes in our documentation.
Creating volumes for Docker
To create our volumes, we’ll create one for the data and one for the configuration of MongoDB.
docker volume create mongodb
docker volume create mongodb_config
Creating a user-defined bridge network
Now we’ll create a network that our application and database will use to talk with each other. The network is called a user-defined bridge network and gives us a nice DNS lookup service that we can use when creating our connection string.
docker network create mongodb
Now, we can run MongoDB in a container and attach it to the volumes and network we created above. Docker will pull the image from Hub and run it for you locally.
docker run -it --rm -d -v mongodb:/data/db -v mongodb_config:/data/configdb -p 27017:27017 --network mongodb --name mongodb mongo
Step 4: Set your environment variables
Now that we have a running MongoDB, we also need to set a couple of environment variables so our application knows what port to listen on and what connection string to use to access the database. We’ll do this right in the docker run command.
docker run
-it --rm -d
--network mongodb
--name notes
-p 8081:8081
-e SERVER_PORT=8081
-e SERVER_PORT=8081
-e DATABASE_CONNECTIONSTRING=mongodb://mongodb:27017/yoda_notes
notes-service
Step 5: Test your database connection
Let’s test that our application is connected to the database and is able to add a note.
curl --request POST
--url http://localhost:8081/services/m/notes
  --header 'content-type: application/json'
  --data '{
"name": "this is a note",
"text": "this is a note that I wanted to take while I was working on writing a blog post.",
"owner": "peter"
}'
You should receive the following JSON back from our service.
{"code":"success","payload":{"_id":"5efd0a1552cd422b59d4f994","name":"this is a note","text":"this is a note that I wanted to take while I was working on writing a blog post.","owner":"peter","createDate":"2020-07-01T22:11:33.256Z"}}Once we are done testing, run ‘docker stop notes mongodb’ to stop the containers.
Awesome! We’ve completed the first steps in Dockerizing our local development environment for Node.js. In Part II, we’ll take a look at how we can use Docker Compose to simplify the process we just went through.
How to set up a local Node.js dev environment — Part 2
In Part I, we took a look at creating Docker images and running containers for Node.js applications. We also took a look at setting up a database in a container and how volumes and networks play a part in setting up your local development environment.
In Part II, we’ll take a look at creating and running a development image where we can compile, add modules and debug our application all inside of a container. This helps speed up the developer setup time when moving to a new application or project. In this case, our image should have Node.js installed as well as NPM or YARN.
We’ll also take a quick look at using Docker Compose to help streamline the processes of setting up and running a full microservices application locally on your development machine.
Let’s create a development image we can use to run our Node.js application.
Step 1: Develop your Dockerfile
Create a local directory on your development machine that we can use as a working directory to save our Dockerfile and any other files that we’ll need for our development image.
$ mkdir -p ~/projects/dev-image
Create a Dockerfile in this folder and add the following commands.
FROM node:18.7.0
RUN apt-get update && apt-get install -y
  nano
  Vim
We start off by using the node:18.7.0 official image. I’ve found that this image is fine for creating a development image. I like to add a couple of text editors to the image in case I want to quickly edit a file while inside the container.
We did not add an ENTRYPOINT or CMD to the Dockerfile because we will rely on the base image’s ENTRYPOINT, and we will override the CMD when we start the image.
Step 2: Build your Docker image
Let’s build our image.
$ docker build -t node-dev-image .
And now we can run it.
$ docker run -it --rm --name dev -v $(pwd):/code node-dev-image bash
You will be presented with a bash command prompt. Now, inside the container, we can create a JavaScript file and run it with Node.js.
Step 3: Test your image
Run the following commands to test our image.
$ node -e 'console.log("hello from inside our container")'
hello from inside our container
If all goes well, we have a working development image. We can now do everything that we would do in our normal bash terminal.
If you run the above Docker command inside of the notes-service directory, then you will have access to the code inside of the container. You can start the notes-service by simply navigating to the /code directory and running npm run start.
Step 4: Use Compose to Develop locally
The notes-service project uses MongoDB as its data store. If you remember from Part I, we had to start the Mongo container manually and connect it to the same network as our notes-service. We also had to create a couple of volumes so we could persist our data across restarts of our application and MongoDB.
Instead, we’ll create a Compose file to start our notes-service and the MongoDb with one command. We’ll also set up the Compose file to start the notes-service in debug mode. This way, we can connect a debugger to the running node process.
Open the notes-service in your favorite IDE or text editor and create a new file named docker-compose.dev.yml. Copy and paste the below commands into the file.
services:
 notes:
   build:
     context: .
   ports:
     - 8080:8080
     - 9229:9229
   environment:
     - SERVER_PORT=8080
     - DATABASE_CONNECTIONSTRING=mongodb://mongo:27017/notes
   volumes:
     - ./:/code
   command: npm run debug

 mongo:
   image: mongo:4.2.8
   ports:
     - 27017:27017
   volumes:
     - mongodb:/data/db
     - mongodb_config:/data/configdb
 volumes:
   mongodb:
   Mongodb_config:
This compose file is super convenient because now we don’t have to type all the parameters to pass to the `docker run` command. We can declaratively do that in the compose file.
We are exposing port 9229 so that we can attach a debugger. We are also mapping our local source code into the running container so that we can make changes in our text editor and have those changes picked up in the container.
One other really cool feature of using the compose file is that we have service resolution setup to use the service names. As a result, we are now able to use “mongo” in our connection string. We use “mongo” because that is what we have named our mongo service in the compose file.
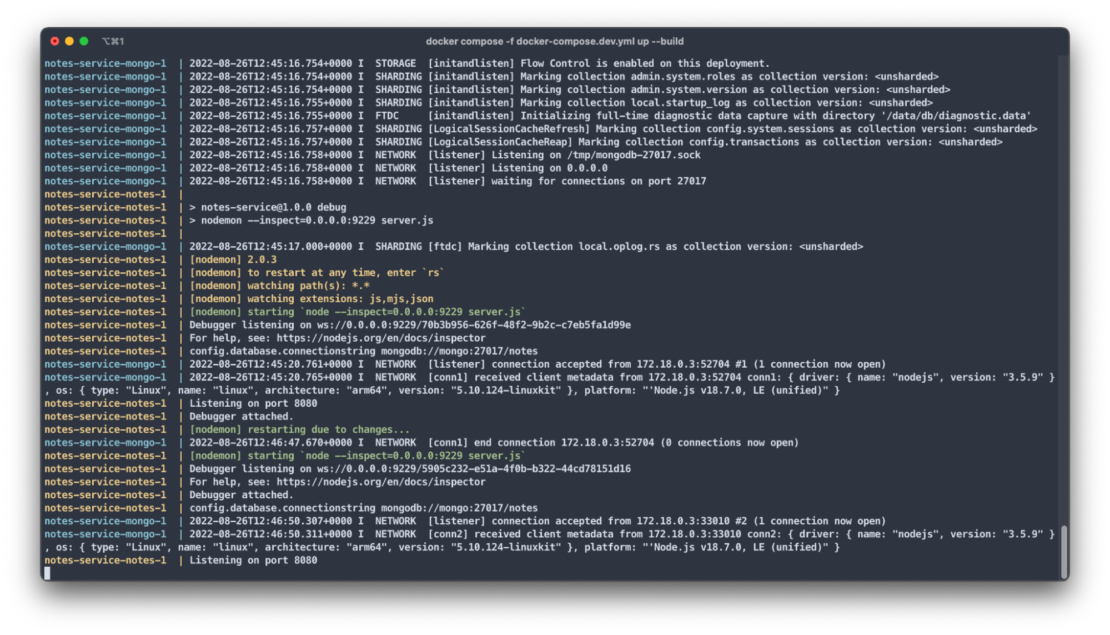
Let’s start our application and confirm that it is running properly.
$ docker compose -f docker-compose.dev.yml up --build
We pass the “–build” flag so Docker will compile our image and then start it.
If all goes well, you should see the logs from the notes and mongo services:


Now let’s test our API endpoint. Run the following curl command:
$ curl --request GET --url http://localhost:8080/services/m/notes
You should receive the following response:
{"code":"success","meta":{"total":0,"count":0},"payload":[]}
Step 5: Connect to a Debugger
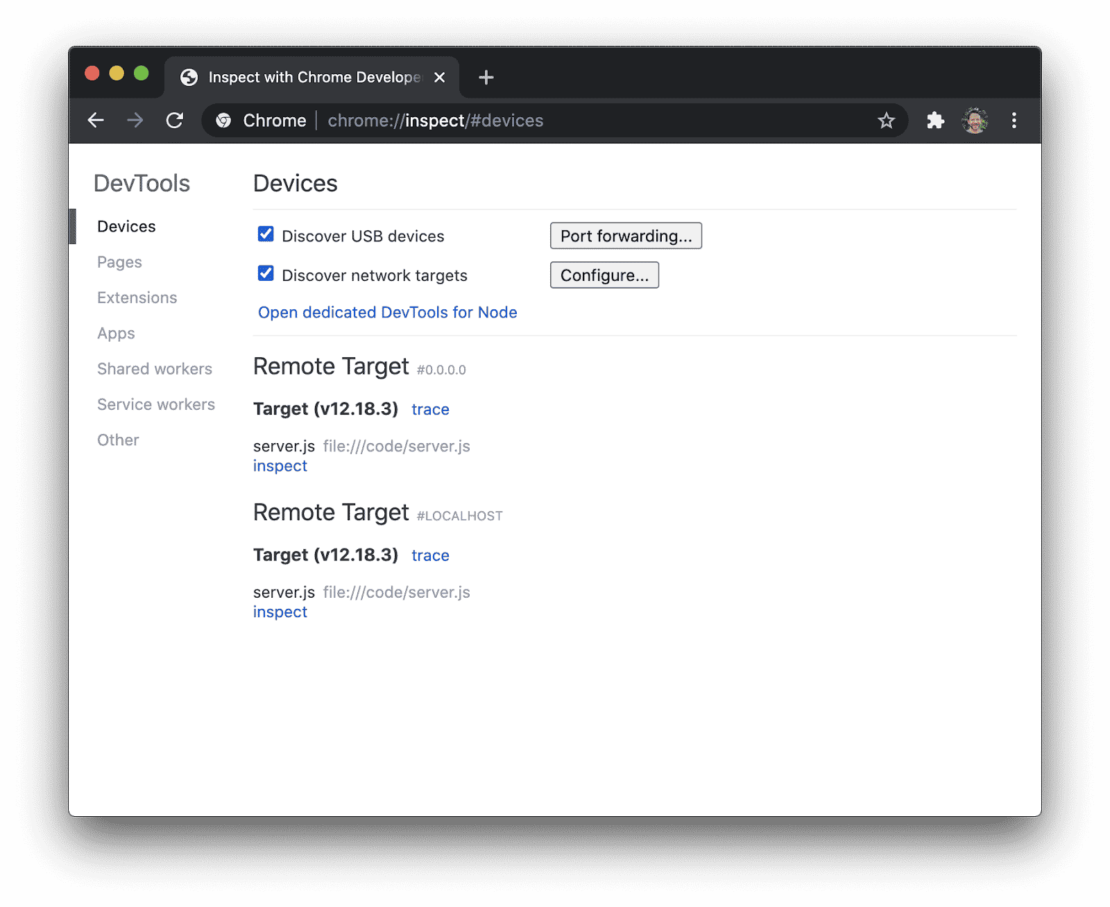
We’ll use the debugger that comes with the Chrome browser. Open Chrome on your machine, and then type the following into the address bar.
About:inspect
The following screen will open.


Click the “Open dedicated DevTools for Node” link. This will open the DevTools that are connected to the running Node.js process inside our container.
Let’s change the source code and then set a breakpoint.
Add the following code to the server.js file on line 19 and save the file.
server.use( '/foo', (req, res) => {
   return res.json({ "foo": "bar" })
 })
If you take a look at the terminal where our compose application is running, you’ll see that nodemon noticed the changes and reloaded our application.


Navigate back to the Chrome DevTools and set a breakpoint on line 20. Then, run the following curl command to trigger the breakpoint.
$ curl --request GET --url http://localhost:8080/foo
💥 BOOM 💥 You should have seen the code break on line 20, and now you are able to use the debugger just like you would normally. You can inspect and watch variables, set conditional breakpoints, view stack traces, and a bunch of other stuff.
Conclusion
In this article, we completed the first steps in Dockerizing our local development environment for Node.js. Then, we took things a step further and created a general development image that can be used like our normal command line. We also set up our compose file to map our source code into the running container and exposed the debugging port.
For further reading and additional resources:

