- Learn with Cisco at Cisco Live 2025 in San Diego
- This Eufy robot vacuum has a built-in handheld vac - and just hit its lowest price
- I highly recommend this Lenovo laptop, and it's nearly 50% off
- Disney+ and Hulu now offer prizes, freebies, and other perks to keep you subscribed
- This new YouTube Shorts feature lets you circle to search videos more easily
How to Use LogMeOnce Step-by-Step Guide

LogMeOnce is a decent password manager that includes a wide range of multifactor authentication (MFA) options.
In this article, we walk you through how to set up and use LogMeOnce. We also answer some frequently asked questions about LogMeOnce and its features.
How to set up and use LogMeOnce
1. Choosing a LogMeOnce subscription
LogMeOnce has a free version and paid plans. While the free version comes with unlimited password storage, features like emergency access, priority email support, and additional MFA options are only available on the paid plans. The paid versions also provide more encrypted file storage, login auditing and activity reporting.
In our hands-on review, LogMeOnce received a score of 3.7 out of 5 stars. Check out our full LogMeOnce review here.
LogMeOnce organizes its paid plans into Personal and Business tiers. For Personal, you can decide between LogMeOnce’s Professional, Ultimate and Family plans. Take note that LogMeOnce’s Premium plan is actually its free version.
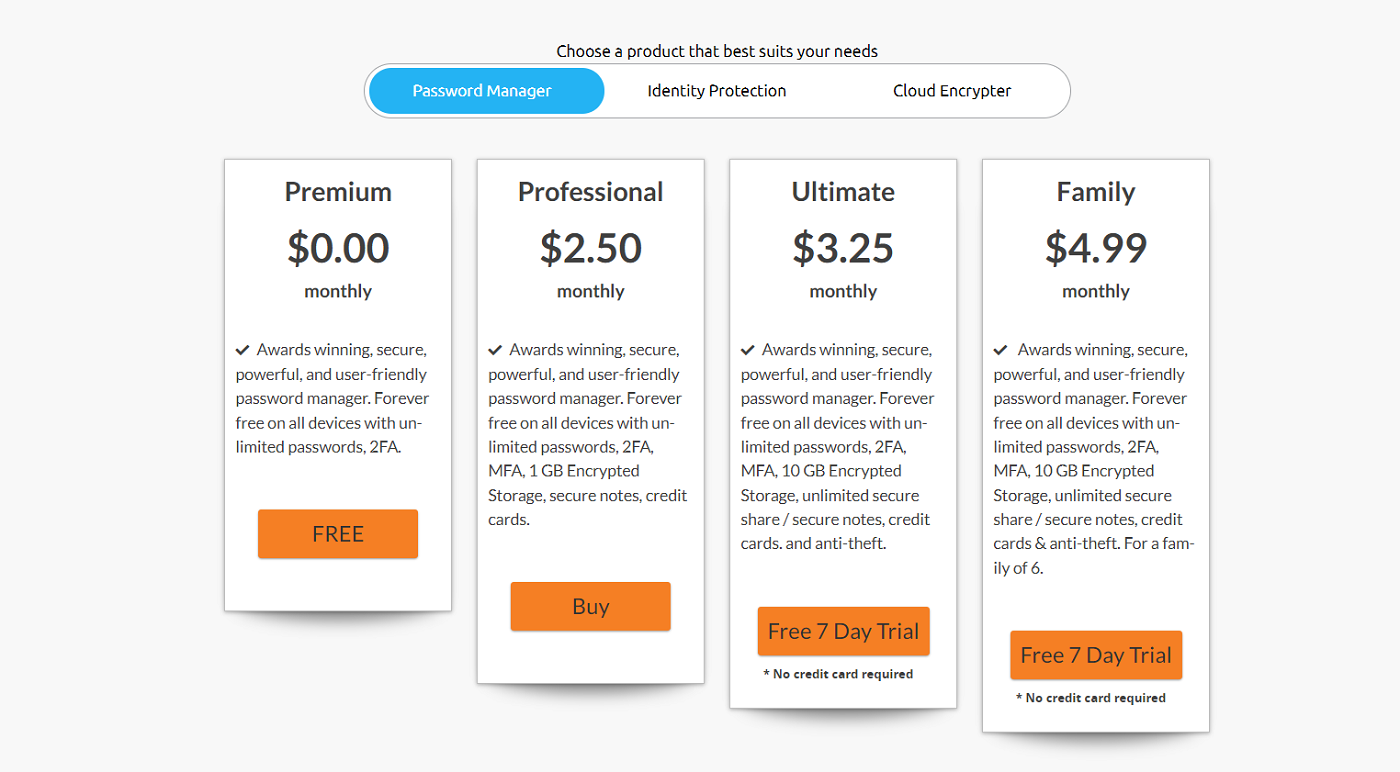
LogMeOnce’s Professional plan is priced at $2.50 per month while its Ultimate subscription is pegged at $3.25 per month. Of the two, Ultimate provides unlimited notes storage and password sharing. It also comes with the most MFA choices. Meanwhile, its Family plan is at $4.99 per month and protects up to six users in total.
For its Business tier, LogMeOnce offers Teams, Business and Enterprise plans.
Teams is priced at $4 per user, per month, while Business goes for $7.99 per user, per month. Enterprise is on a quote-based system so you’ll have to contact LogMeOnce to get curated pricing.
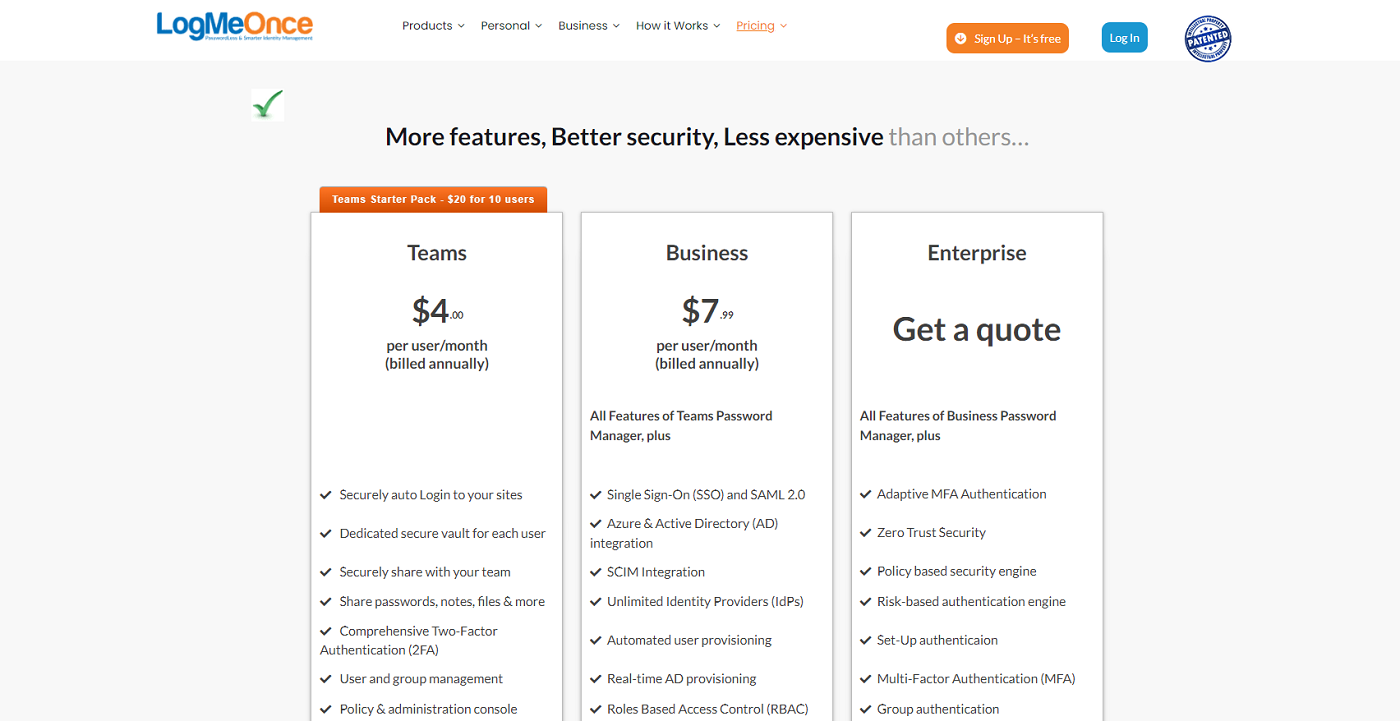
LogMeOnce Teams includes management-focused features like standard password policies, audit trails, and an administration console. LogMeOnce Business includes all Teams features and bolsters it with Single Sign-On (SSO) and SAML 2.0 support, Azure and Active Directory integration, and dark web monitoring.
LogMeOnce Enterprise comes with all Business features and adds adaptive MFA authentication, IP address policy restriction, and corporate identity scoring, among others.
If you’re a single user, I highly recommend going for LogMeOnce’s seven-day free trial of the Ultimate plan first. This gets you a chance to test drive their paid features without paying for a subscription.
For businesses or large organizations, LogMeOnce has a 14-day free trial for Teams and Business. Fortunately, both the Personal and Business free trials don’t require any credit card information to access.
For this demonstration, I chose to try the free trial for LogMeOnce Ultimate.
2. Downloading and setting up LogMeOnce
After selecting the Free 7 Day Trial for the Ultimate plan, I was redirected to an account creation page on LogMeOnce. I filled in my name and email address. This is also where LogMeOnce asked me to create my master password — the main key we’ll be using to access our LogMeOnce vault.
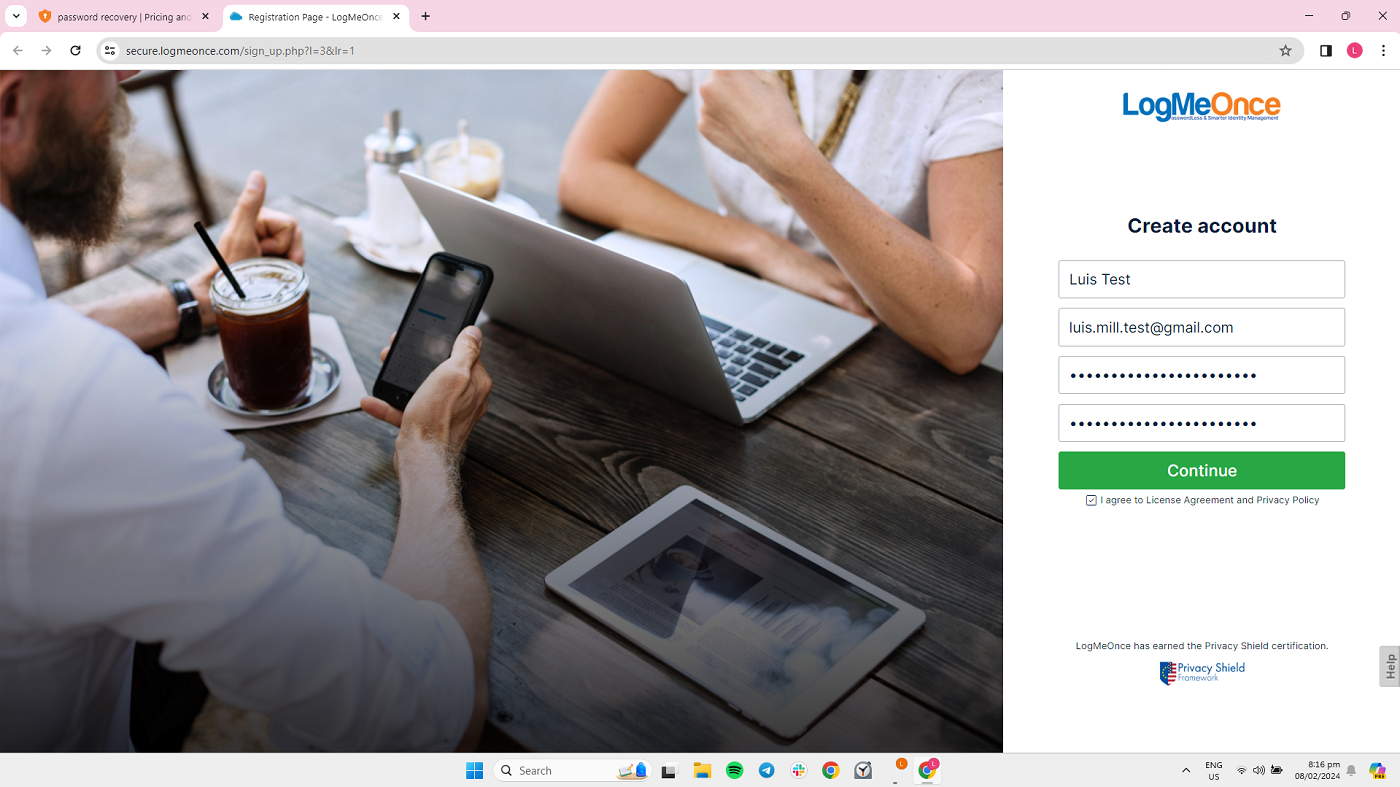
In theory, this is the only password you’ll need to create on your own. Because it’s the main way to access your account, make sure to remember whatever master password you set.
After that, LogMeOnce asked me to set a security question as a backup measure if I ever need to recover my account. I highly suggest choosing a question-and-answer combination that’s very specific to you — just to make sure it isn’t easily predicted by malicious hackers.
From there, I was taken to the main LogMeOnce page and asked if I wanted to go through a quick tour of the application. I recommend going through it to get a brief overview of LogMeOnce.
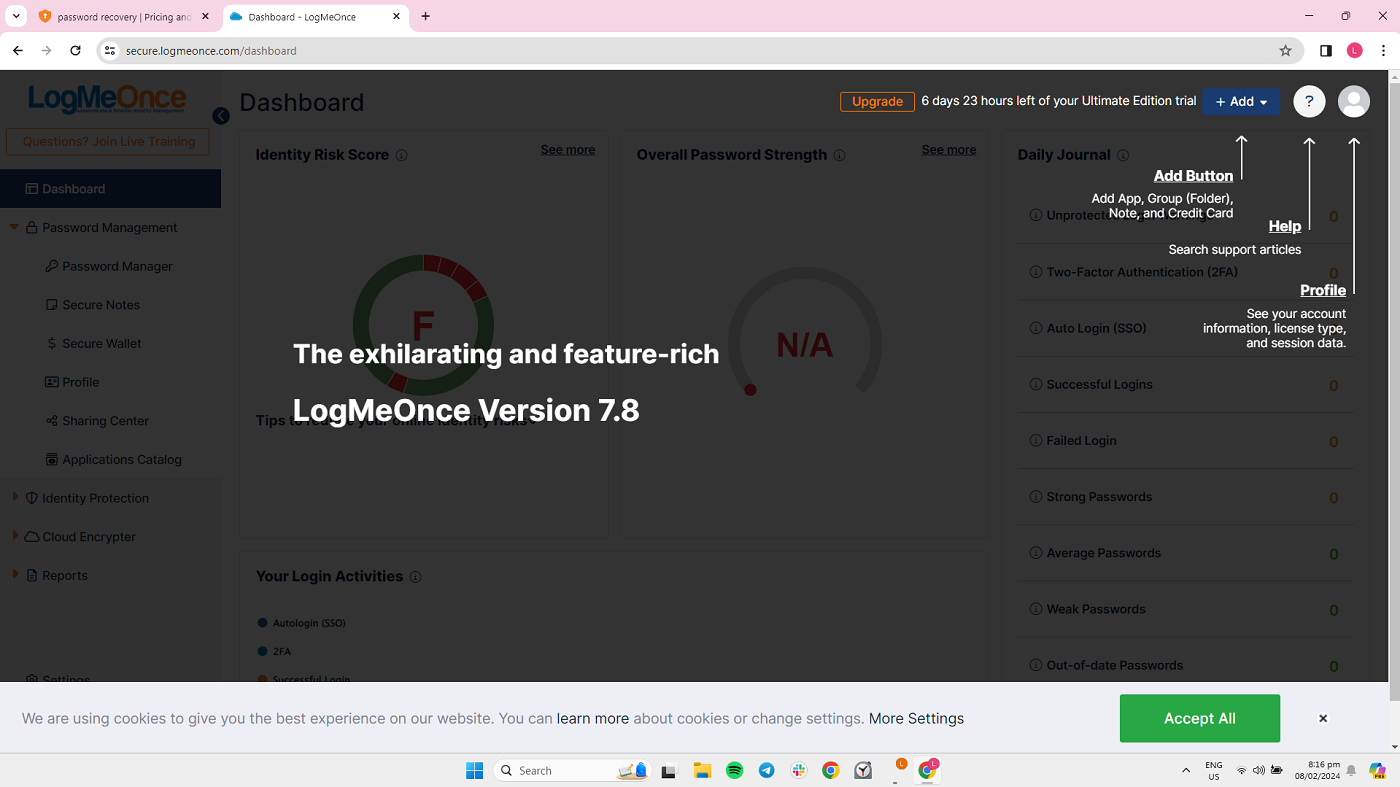
After the tour, LogMeOnce prompted me to download its companion browser extension. I encourage you to do the same since this is the best way to use LogMeOnce for password capture and autofill.
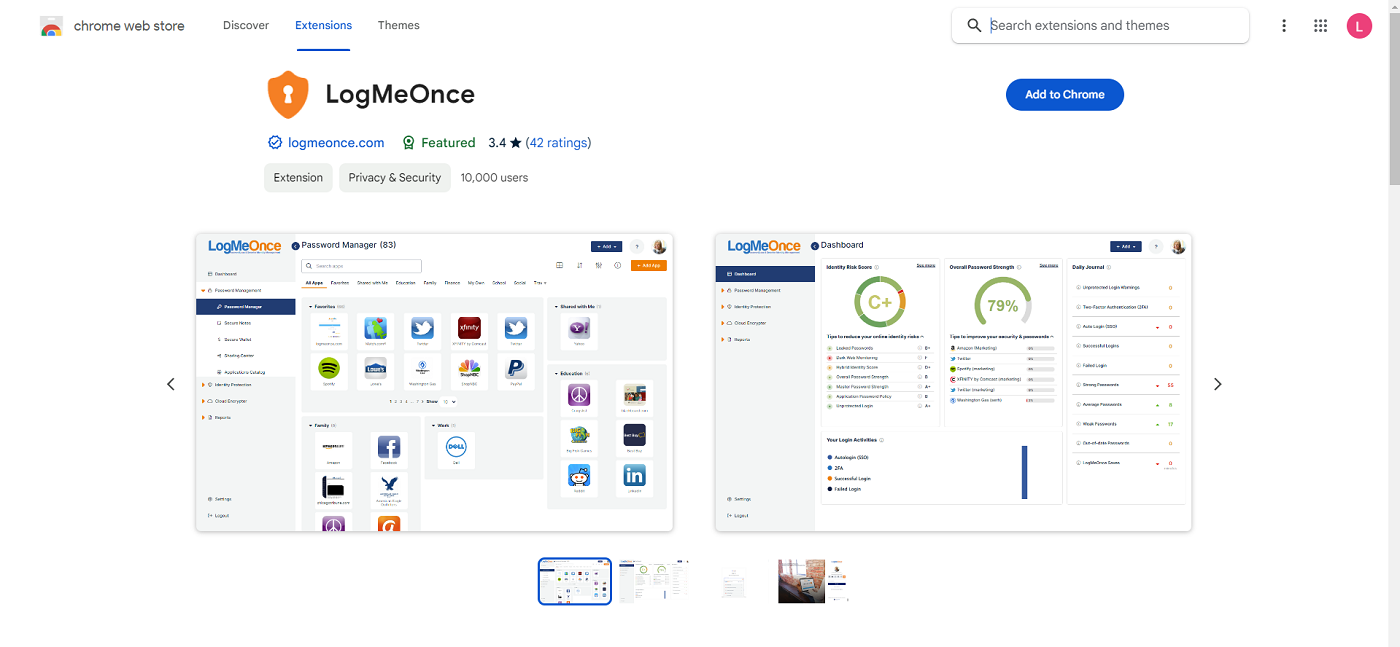
Once I had the browser extension installed, I was finally directed to the main LogMeOnce password manager dashboard.
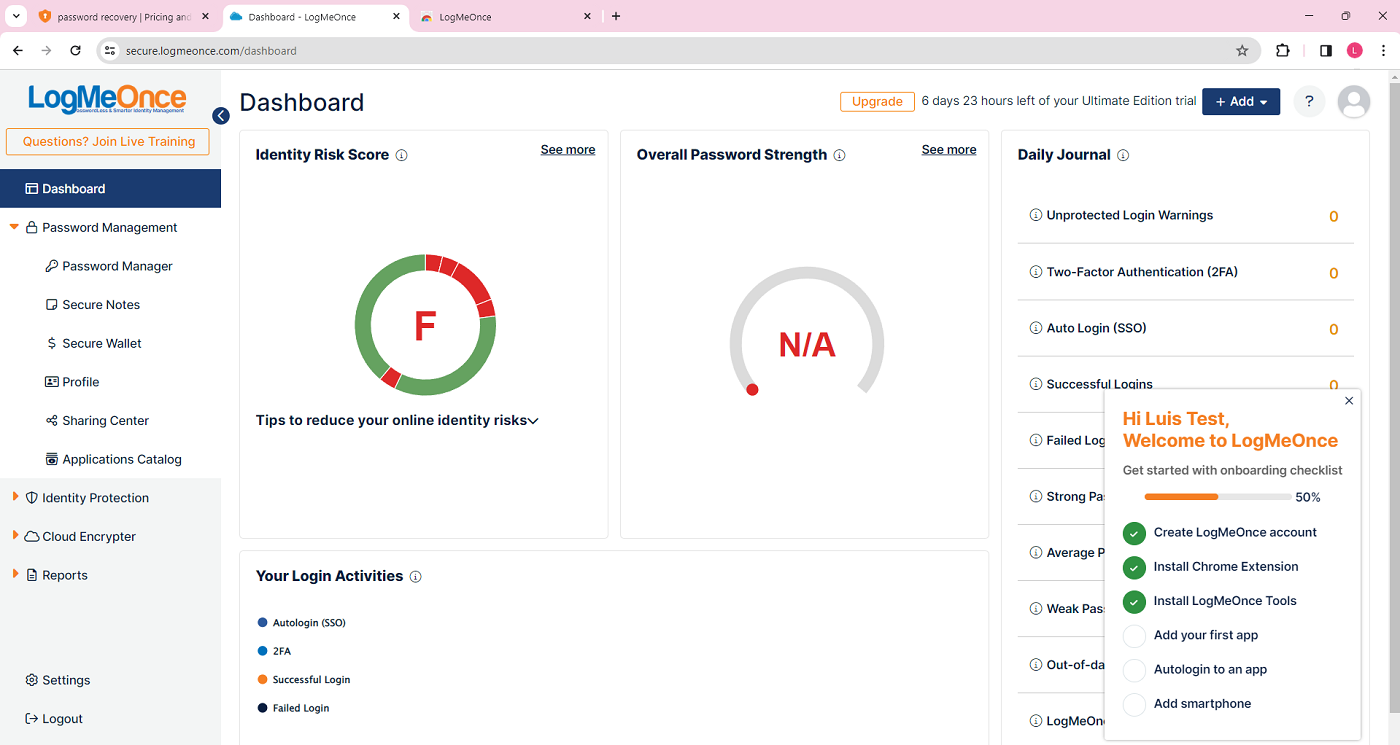
3. Saving your first login with LogMeOnce
Now that LogMeOnce is ready to go, it’s time to create and save our first login. To demonstrate, I’ll be making a new Udemy account.
I went to the Udemy account creation page and saw that there was a LogMeOnce logo on the username and password fields.
When I clicked the logo on the password field, LogMeOnce’s password generator popped up with an auto-generated password.
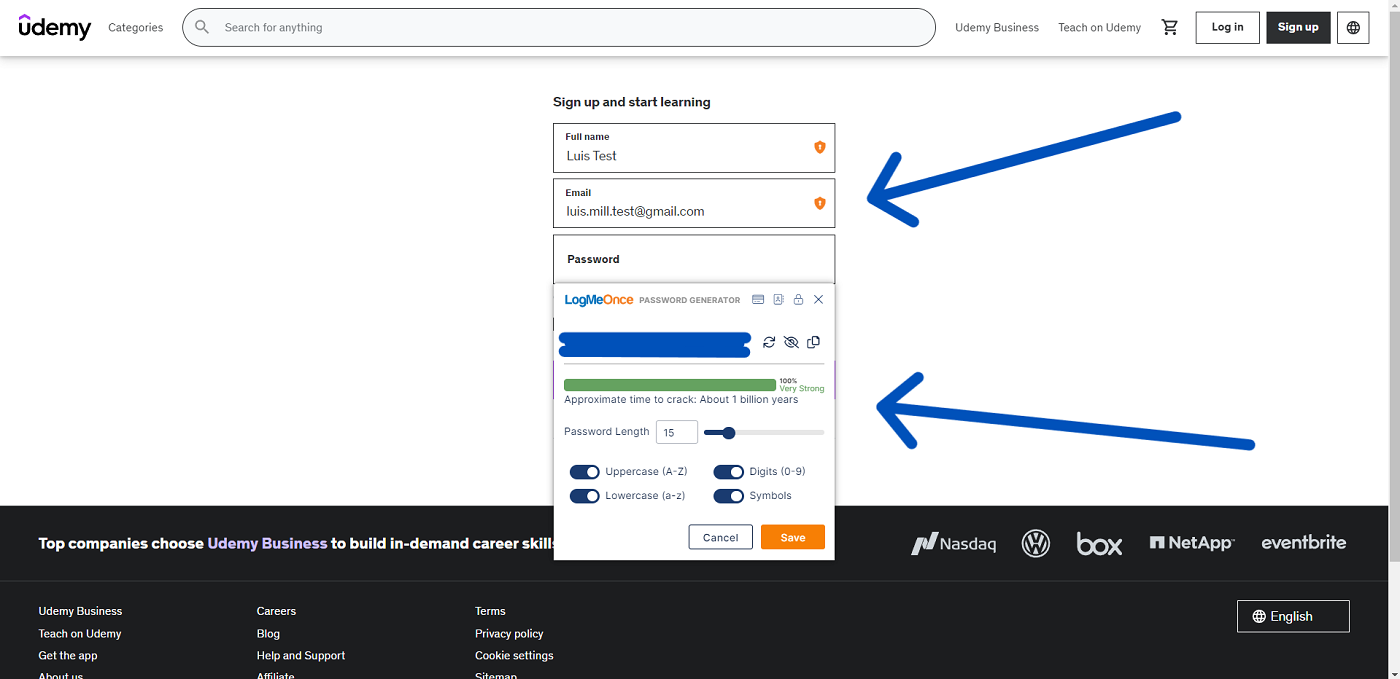
By default, LogMeOnce creates a 15-character password with a combination of uppercase and lowercase letters, numbers and digits. You can have it generate a password of up to 50 characters.
After I decided on a master password and filled in my other details, I clicked Save on the password generator pop-up. After that, LogMeOnce asked me to confirm this newly saved login.
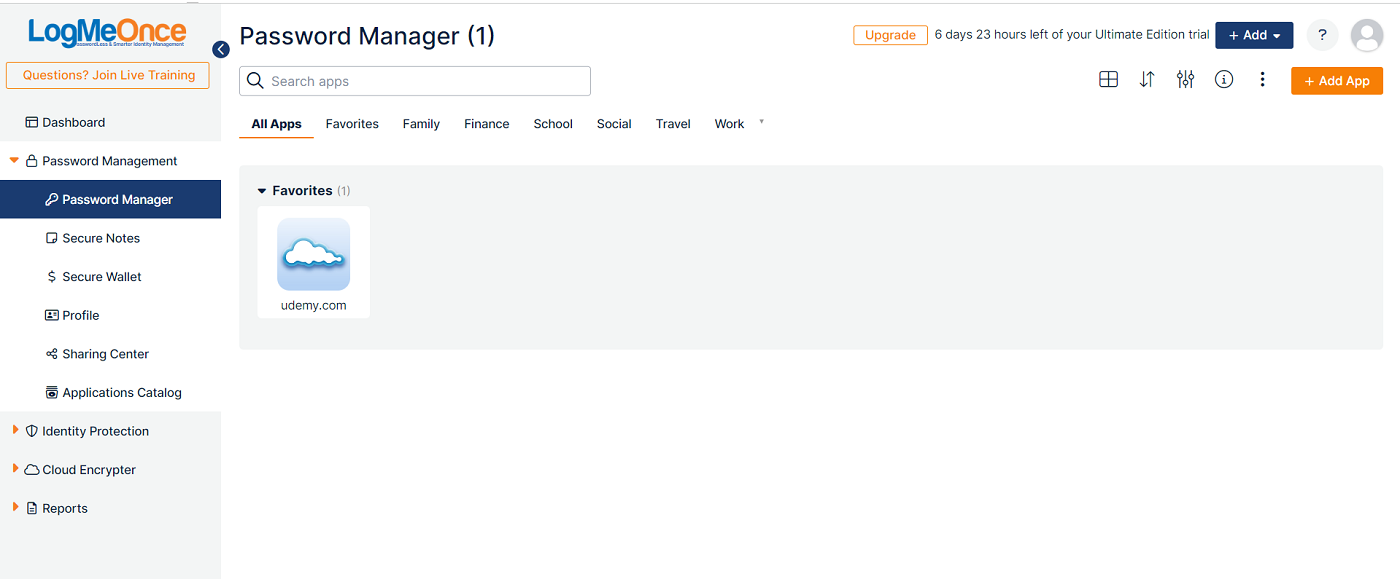
Once I did, my new Udemy login credentials were successfully saved on my LogMeOnce vault.
LogMeOnce frequently asked questions (FAQs)
Is LogMeOnce free?
Yes, LogMeOnce has a free version with limited features. It provides unlimited password storage for an unlimited number of devices.
However, opting for the free version means you lose out on paid features such as advanced login audits, emergency access and live password tracking.
What operating systems does LogMeOnce support?
LogMeOnce supports Windows, macOS and Linux for its desktop application. For browsers, LogMeOnce has extensions for Chrome, Firefox, Edge, Internet Explorer and Safari.
It also has mobile apps for both iOS and Android platforms.
How do I import passwords into LogMeOnce?
To import passwords, go to your LogMeOnce password vault. From there, look for the three-dotted kebab button on the upper right of the dashboard.
Click the kebab button and select Import Passwords. From here, LogMeOnce will ask you to install their LogMeOnce Tools plugin. Download and install the plugin.
Once you’ve installed the Tools plugin, you’ll be redirected to the Import Passwords page. Here, you can choose how you want to import your passwords. You can select to import from other password managers or to upload a generic CSV file.
How many devices can I use LogMeOnce on?
LogMeOnce grants you access and syncing to an unlimited number of devices on both its free and paid versions.
This means you can use LogMeOnce on your smartphone, computer or tablet simultaneously.
What if LogMeOnce isn’t working
If you encounter any problems with LogMeOnce, you can visit its official Support Center. It houses FAQ articles for both personal and business tiers, video tutorials and its online support request form.
For more pressing issues, LogMeOnce also has an official support email and US phone number. Take note that business or office hours may apply with regard to their phone support.
What we think of LogMeOnce
In our full review, LogMeOnce received a rating of 3.7 out of 5 stars. We highlighted its unpolished user interface on both the desktop and mobile versions for the lower score.
While LogMeOnce comes with a generous free version and a decent set of features, there are simply other password managers that provide the functionality with a better user experience.
If you want to learn more, read our full review and analysis of LogMeOnce here.

