vCenter 5.5 Upgrade with Windows Server 2012 R2
This Upgrade Guide details the step-by-step process for upgrading your vCenter Server from 5.1 to 5.5 Update 1c. Also included is the build of a new Windows Server 2012 R2 OS for the vCenter 5.5 services whilst maintaining a separate SQL Server 2008 R2 Database.
I was unfortunate enough to make the decision to deploy the distributed vCenter model in vSphere 5.0, which I maintained through to vSphere 5.1 with SSO 5.1, which has been an operational nightmare to manage. This post also covers the consolidation of the distributed model to a centralised vCenter setup with an existing, separate Database server.

Overview of the process
- Preparation & Planning
- Prepare the vSphere Management Cluster
- Shutdown the existing vCenter services and re-purpose the existing hybrid vCenter/Database server to be a dedicated Database server.
- Windows Server 2012 R2 server Operating System installation
- Customise the Windows Server 2012 R2 OS
- Install the .Net Framework 3.5 Features
- Install and Configure the 64-bit DSN
- Import the SSL directory from the original vCenter server
- Install the vCenter Single Sign-On, vSphere Web Client, Inventory Service and vCenter Server
- Post Installation Cleanup – including re-integration of Cloud Management Infrastructure (some are covered in this series, but most is out of scope)
Preparation & Planning
- This process takes approximately 3 hours.
- Download the Binaries for Windows Server 2012 R2, SQL Server 2008 R2 & VMware vCenter 5.5 Update 1c (Build 1945270). Copy these binaries to a Datastore that is accessible by the Management hosts.
- Configure a DRS VM-Host rule that places all vCenter infrastructure on the same Management host, this way you will only need one vSphere Client connection during the upgrade.
- Take vSphere Snapshots of all vCenter server infrastructure VMs, including vUM, vC Ops, vIN, vCM, CBM, etc. This will allow you to roll-back quickly if things go wrong.
- Take a full database consistent backup of your vCenter Database server.
- Document the RBAC configuration for the entire vCenter hierarchy. This will be recreated manually. NOTE: if your vCenter server and SSO service are on the same VM, then the upgrade process will upgrade the service, maintaining the RBAC configuration (see Alternatives heading below).
- The SSO 5.1 user “admin@SYSTEM-DOMAIN” has changed to “administrator@vsphere.local” in SSO 5.5.
Assumptions
- You know what you are doing and have the ability to make changes to vCenter, Active Directory, DNS, etc. (directly or indirectly).
- You have checked that all of your vCenter plugins and third party services support vSphere 5.5 Update 1c. You have the necessary procedures for any re-integration tasks.
- You have a fully functioning vSphere environment with virtual machines running. No Physical vCenter servers.
Risks
- This process does not migrate the vCenter 5.1 SSO server data to vCenter 5.5. All permissions will be recreated from scratch.
- Roll-back – original vSphere infrastructure is a “snapshot restore” away if the upgrade process fails.
Alternatives
- Migrate the SSO 5.1 service to the Windows 2012 R2 server and then upgrade the SSO 5.1 service to SSO 5.5.
- Upgrade the existing vCenter 5.1/DB server from 5.1 to 5.5 U1c. WARNING: Inventory service installation failed with “Expired SSL Certificate” errors, even though the certificates had been regenerated and were valid.
Other resources
- VMware vSphere Installation & Setup Guide
- Wahl Network – Migrating a vCenter Server Installation? Don’t Forget Your SSL Certificates!
Part 2
Prerequisites
- You have a validated design for your new vCenter management layer.
- You have checked all systems that integrate with vCenter support vSphere 5.5 Update 1c.
- You have an approved scheduled downtime from your Release Management team.
- You have downloaded the necessary binaries.
- You have a valid Windows Server 2012 R2 Data Center Edition licence (KMS server used in this case)
- You have valid IP addresses and hostnames for the vCenter 5.5 servers.
- You have administrator access (direct/indirect) to Active Directory, DNS, ESXi hosts, etc.
- You have tested this process in a test environment before moving to Production.
- You have an AD “vCenter” OU which has a “optimised” Group Policy configured specifically for vCenter.
- You have a “optimised” Anti-Virus policy specifically configured for vCenter.
Preparing the vSphere Management Cluster
- Create the DRS VM-Host rule that binds the vCenter Management Layer to a single Host in your Management Cluster.
- Take vSphere Snapshots of your vSphere 5.1 Management Layer Virtual Machines as part of your roll-back strategy. Make sure you include all VMs in the management ecosystem that integrate with vCenter: VUM, vCOPs, vCAC, vCD, CBM, vCM, vShield Manager, etc.
- Take a Database consistent backup of the vCenter 5.1 SQL Server database.
- Upload the ISO images (Windows Server 2012 R2, Microsoft SQL Server 2008 R2 & VMware vCenter 5.5 Update 1c) to a Datastore that your Host has access to.
- Connect your vSphere Client directly to the ESXi Host you selected in Step 1.
- Create the VM that will run Windows Server 2012 R2. For a “Small” vCenter deployment, configure 6 vCPUs, 14GB RAM, 2 vDisks (100GB & 40GB), vNIC vmxnet3 and connect the CD-ROM to the Windows Server 2012 R2 ISO image.


Shutdown the Original vCenter 5.1 Servers
- Open the Console to your Web Client, Inventory and Web Client servers and gracefully shutdown the VMs.
- Open the Console to your vCenter/Database server and uninstall the vCenter 5.1 software.
- WARNING: DO NOT DELETE “C:\ProgramData\VMware\VMware VirtualCenter\SSL\” DIRECTORY. These certificates will be copied to the new vCenter server later on.
- Change the IP Address of the VM to another IP in the same subnet. The original IP will be assigned to the Win2012 R2 server, which means you may not have to change a lot of firewall rules.
- Change the name of the VM to the organisational naming standard for databases. The original name will be assigned to the Win2012 R2 server, this means administrators will continue to use the same name for access. You will have to remove the VM from the Domain, change the name and add it to AD again.
- After the necessary reboots, login to the Database server and run the “SQL Server Management Studio”. Login as “sa” with the relevant password.
- Browse to the “Database” folder and record the name of the vCenter Database configured, this will be required later. Verify that “vpxuser” exists in the “Permissions” option under Database “Properties”.


Installing Windows Server 2012 R2 Data Center Edition with GUI
- Check that the Windows Server 2012 R2 ISO image is connected to the CDROM of the vCenter Virtual Machine.
- Power-On the VM and wait for the Windows Server 2012 R2 installation screen to appear. Select “Next”.
- Select “Install Now”.
- Select “Windows Server 2012 R2 Data Center (Server with a GUI) x64″ and select “Next”.
- Accept the licence and select “Next”.
- Select “Custom: Install Windows only (advanced)”.
- Select “Drive 0 Unallocated Space” (100GB) and select “Next”.
- Wait for the “Installing Windows” screen to complete and then the VM will reboot.
- In the “Settings Window”, set the “Administrator Password”.
- When the “Press Ctrl+Alt+Delete to sign-in” message appears you can login.


Customise the Windows Server 2012 R2 Operating System for vCenter
- Install VMware tools. This is especially required for the vNIC “vmxnet3″ driver.
- Access the “Server Manager” interface (it should start automatically after login) and configure the following OS settings.
- Set the Time-Zone.
- Disable the Windows Firewall for the Domain, Private and Public profiles.
- Configure the vNIC: IP Address of original vCenter 5.1 server, Netmask, Gateway and DNS servers.
- Disable Internet Explorer Enhanced Security.
- Change the computer name to that of the original vCenter 5.1 server and add to Active Directory.
- Move the Computer object to the “vCenter” OU in AD (Domain Admin task).
- Install Anti-Virus and set the “vCenter” AV policy (Information Security task).
- Check that the server licence is activated from the KMS server.
- Check that the server has been updated with the latest patches from the WSUS server.
- From “Server Manager”, select “Tools” and then “Computer Management”.
- Within the “Computer Management” window, select the “Disk Management” object. Browse to the “Unknown” 40GB Disk and place it “Online”, then “Initialise” with “GPT” and finally create a “Simple Volume” that will map to E:.
- Within the “Computer Management” window, select the “Local Users & Groups” object. Browse to the “Administrator” Group and add the administrator groups and users that will manage this vCenter. In particular, your service account for vCenter must be added.


Install .Net Framework 3.5 Features
- From “Server Manager”, select “Manage” and then “Add Roles and Features”.
- Select “Next”.
- Select “Role-based or feature-based installation” and select “Next”.
- Press “Select a server from the server pool”, make sure the “Windows Server 2012″ OS is highlighted and select “Next”.
- Tick “Application Server” and select “Next”.
- Tick “.NET Framework 3.5 Features” and select “Next”.
- Select “Next”.
- Select “Next”.
- Press “Specify an alternate source path” and define the “Path” as “D:\sources\sxs” and press “OK”.
- Select “Install”.
- Once the feature installation progress has “succeeded”, press the “Close” button.


Install and Configure the 64bit DSN
- Mount the Microsoft SQL Server 2008 R2 ISO image to the CDROM of the virtual machine.
- Search for “sqlncli” or browse to D:\x64\setup\x64 and run “sqlncli.msi”. Install the Microsoft SQL Server 2008 R2 Native 64-bit Client.
- Unmount the ISO image.
- Press the Windows “Start” button and run the “ODBC Data Sources (64-bit)” program.
- Select the “System DSN” tab and then press “Add”.
- Select the “SQL Server Native Client 10.0″ driver and then press “Finish”.
- Enter the name “VCENTERDB”, the description “VCENTERDB” and then select the name of the vCenter Database server (SQL Server 2008 R2) configured earlier from the “Server” list. Press “Next”.
- Select “With SQL Server authentication using a login ID and password assigned by the user”, use the “vpxuser” and password and press “Next”.
- Tick “Change the default database to” the vCenter Database name recorded earlier.
- Select “Finish”.
- Select “Test Data Source”. Verify “TESTS COMPLETED SUCCESSFULLY!” appears and select “OK”. Then select “OK” again.
- Verify that the “System DSN” tab now has a “VCENTERDB” System Data Source with a “SQL Server Native Client 10.0″ driver. Then select “OK”.


Copy the SSL Directory from the old vCenter server
- Copy the SSL directory from the “C:\ProgramData\VMware\VMware VirtualCenter\SSL\” from the old vCenter server
- Create a vSphere “Baseline” Snapshot. This will be used for roll-back if the vCenter installation is corrupted in any way during Part 3.
- Reboot server by opening a Power Shell window and typing “shutdown /r”.


![]()
PART 3
Prerequisites
- Prepare the vSphere Management Cluster
- Shutdown the existing vCenter services and re-purpose the existing hybrid vCenter/Database server to be a dedicated Database server.
- Windows Server 2012 R2 server Operating System installation
- Customise the Windows Server 2012 R2 OS
- Install the .Net Framework 3.5 Features
- Install and Configure the 64-bit DSN
- Import the SSL directory from the original vCenter server
- If you used custom ports in vCenter 5.1, then make sure you know what they are, so that you can configure them here. You will have to modify your firewall rules since the vCenter services are now centralised.
Install the vCenter Single Sign-On Service
- Make sure the vCenter 5.5 Update 1 ISO image has been mounted to the CDROM of the Windows Server 2012 R2 Virtual Machine.
- Open the console of the new vCenter VM running Windows Server 2012 R2 and login with the AD “vCenter” service account.
- Browse to the CDROM and select the “autorun.exe” file and “Run as Administrator”.
- In the VMware vSphere 5.5 vCenter Installer window, select “vCenter Single Sign-On” from the “Custom Install” and press “Install”.
- Select “Next”.
- Accept the licence agreement and select “Next”.
- Make sure the “Host name” is displayed, “FQDN” is displayed, “IP Address” is displayed, “Machine is joined to <domain>” has a green tick and “DNS resolution is successful” has a green tick.
- Make sure “Add <domain> as a native Active Directory identity source” is ticked and then press “Next”.
- Select “vCenter Single Sign-On for your first vCenter Server” is selected and press “Next”.
- Create the password for “administrator@vsphere.local”. It should be complex, with upper case, lower case, numerals and one special character (recommend “!”, this is because in SSO 5.1 other special characters caused the SSO scripts to fail – not sure if this is true for 5.5). WARNING: record this password in a safe place, it is the master key to your entire vCenter infrastructure.
- Enter the “Site name” and press “Next”.
- If you use custom ports, configure it here. Select “Next”.
- Change the “Destination folder” to E:\ and select “Next”.
- Select “Install”.
- Select “Finish”.
- Open the Services application and verify that the VMware “Certificate”, “Directory”, “Identity Management”, “Kdc” and “Security Token” services are installed and running.


Install the vSphere Web Client Service
- In the VMware vSphere 5.5 vCenter Installer window, select “vSphere Web Client” from the “Custom Install” and press “Install”.
- Select “OK”.
- Select “Next”.
- Accept the licence agreement and select “Next”.
- Leave the “Destination folder” as C:\ and select “Next”. If you change this, then the Web Client will not function, you will have to uninstall the vSphere Web Client and reinstall it with the default destination folder.
- If you use custom ports, configure it here. Select “Next”.
- Enter the “administrator@vsphere.local” password and select “Next”.
- Accept the SSO leaf certification by pressing “Yes”.
- Select the “Install certificates” button.
- Select “Install”.
- Select “Finish”.
- Press “OK”.
- Open the Services application and verify that the VMware “vSphere Web Client” service is installed and running.


Install the vCenter Inventory Service
- In the VMware vSphere 5.5 vCenter Installer window, select “vCenter Inventory Service” from the “Custom Install” and press “Install”.
- Select “OK”.
- Select “Next”.
- Accept the licence agreement and select “Next”.
- Change the “Destination folder” to E:\ and select “Next”.
- Select “Next”.
- If you use custom ports, configure it here. Select “Next”.
- Select the “Inventory Size” and press “Next”. “Small” is used in this case.
- Enter the “administrator@vsphere.local” password and select “Next”.
- Accept the SSO leaf certification by pressing “Yes”.
- Select “Install”.
- Select “Finish”.
- Open the Services application and verify that the VMware “vCenter Inventory” service is installed and running.


Install the vCenter Server
- In the VMware vSphere 5.5 vCenter Installer window, select “vCenter Server” from the “Custom Install” and press “Install”.
- Select “OK”.
- Select “Next”.
- Accept the licence agreement and select “Next”.
- Skip the “Licence key” and press “Next”. The licence key is already stored in the SQL Server Database.
- Select “Use an existing supported database” and select “VCENTERDB (MS SQL)” from the DSN list. Then press “Next”.
- Enter the “vpxuser” “Database password” and press “Next”.
- Press “OK” for the VUM “registered extensions” message.
- Select “Do not overwrite. Leave my existing database in place” and press “Next”.
- Select “Next”.
- If you use custom ports, configure it here. Select “Next”.
- Select the “Inventory Size” and press “Next”. “Small” is used in this case.
- Enter the “administrator@vsphere.local” password and select “Next”.
- Accept the SSO leaf certification by pressing “Yes”.
- Enter the Active Directory username or group that will be configured as an administrator of vCenter. Select “Next”.
- Select “Next”.
- Change the “Destination folder” to E:\ and select “Next”.
- Select “Install”.
- Select “Finish”.
- Open the Services application and verify that the VMware “VirtualCenter Server” service is installed and running.


Install the vSphere Client
- In the VMware vSphere 5.5 vCenter Installer window, select “VMware vSphere Client” from the “VMware vCenter Desktop Client” and press “Install”.
- Complete the vSphere Client installation and run the vSphere Client.
- Connect to the vCenter server with the vCenter server 5.5 hostname and login.
- Check that all hosts are connected and that all alarms are accounted for.
- Recreate the original RBAC permissions that were recorded from the vCenter 5.1 server.
- From the Windows Server Start menu, select the vSphere Web Client and login.
- Verify that the vSphere Web Client is functioning correctly.
- On your Desktop close all consoles and disconnect the vSphere Client from the Management host.
- Install the vSphere Client 5.5 on your Desktop and connect to the vCenter server 5.5 and login.
- Take a vSphere Snapshot of the vCenter and Database servers. This provides a roll-back if any part of the Cloud Management re-integration process fails.


PART 4
Prerequisites
- Fully functioning vCenter 5.5 server
- Re-integration procedures for reconnecting your Cloud Management infrastructure with vCenter 5.5.
Cloud Management Re-integration
- For each Cloud Management component, follow the process of re-integration with vCenter 5.5 (vCD, vCAC, Avamar, vC Ops, vIN, Veeam, vCM, CBM, vCO, etc.)
- Hopefully this is successful because you fully tested this process in your lab. However, if any component fails with re-integration, open tickets with support and hopefully it will be resolved. WORST CASE: Activate the roll-back plan back to vCenter 5.1 for all infrastructure.
Cleanup
- Everything has been running perfectly for a period of time. You have decided that the danger period has passed and made the decision to stick with vCenter 5.5.
- Delete all vSphere Snapshots.
- Delete all remaining distributed vCenter 5.1 VMs (vSphere Web Client, Inventory Service, SSO).
- Unmount any ISO images from the vCenter and Database VMs.
- Upgrade completed. Well done!
PART 5
Prerequisites
- You have completed steps 1 to 4.
- You have administrator access to vCenter and the vCenter Database server.
- You have mounted the vCenter installation ISO image to the vCenter server.
- Extend E: of the vCenter server to handle the Patch repository (120GB).
- Add F: to the vCenter server to be the Syslog repository (40GB).
Prepare the vCenter Update Manager Database on the existing vCenter Database Server
- RDP or open the console to the vCenter SQL Server and run the Microsoft SQL Server Management Studio.
- Login as “sa”.
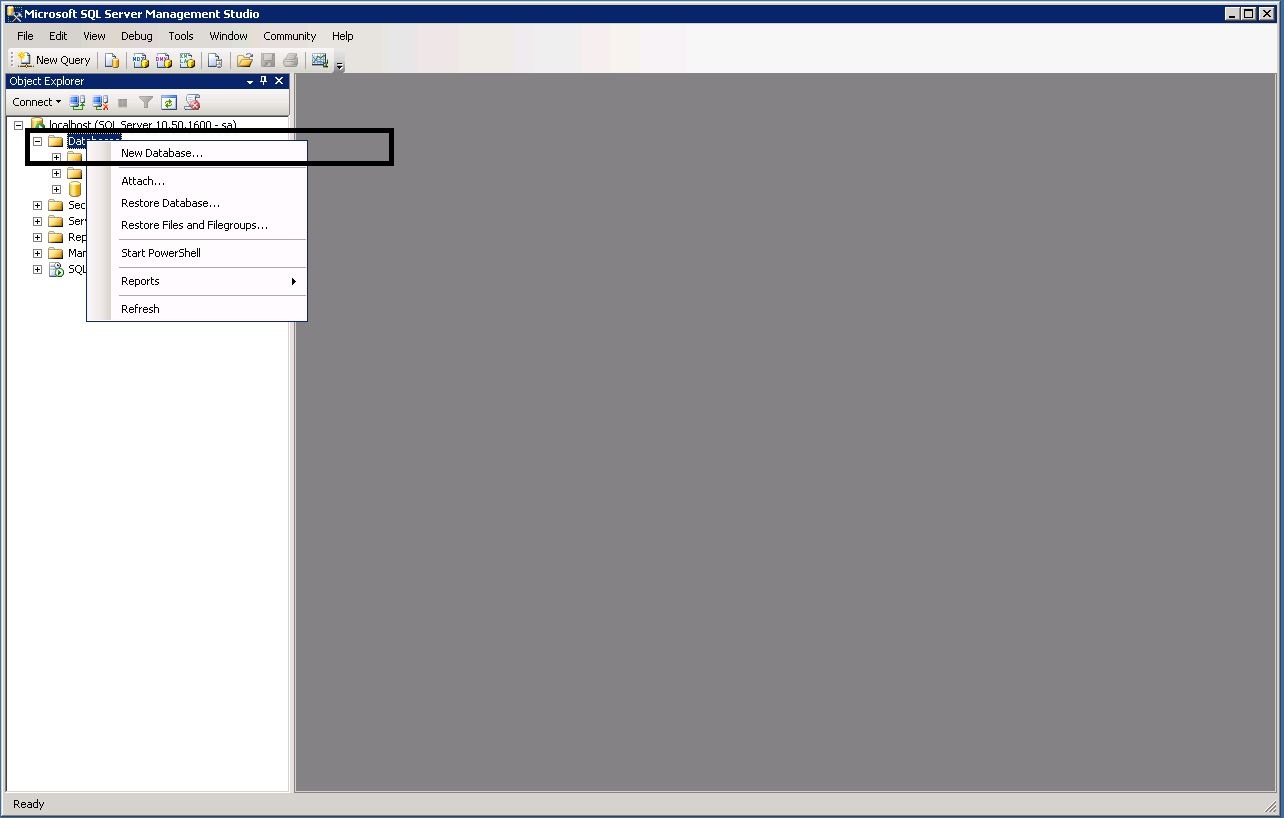
- Select the “Databases” folder and right mouse click. Select “New Database”.
- Enter the “Database name” and make sure the owner is “sa”.
- Select the “Options” tab and set the “Recovery Model” to “Simple”. Then press “OK”.
- Select the “Security” folder and then the “Logins” sub-folder and select “vpxuser”. Right mouse click and press the “Properties” option.
- Select the “User Mapping” object and tick the new vUM database you just created.
- Then tick the “db_owner” role in the “Database role membership” window and make sure the “Default Schema” is set to “dbo”.
- Press “OK”.
- Then access the “Database Properties” of the vUM database and select the “Permissions” object. Make sure that the “vpxuser” is listed as a “User”. Press “OK”.


Install and Configure the 32bit DSN for the vUM Database
- Press the Windows “Start” button and run the “ODBC Data Sources (32-bit)” program.
- Select the “System DSN” tab and then press “Add”. Note the existing 64bit DSN for the vCenter DB already configured in Part 2.
- Scroll down to the bottom and select the “SQL Server Native Client 10.0″ driver and then press “Finish”.
- Enter the name “VUMDB”, the description “VUMDB” and then select the name of the vCenter Database server (SQL Server 2008 R2) configured earlier from the “Server” list. Press “Next”.
- Select “With SQL Server authentication using a login ID and password assigned by the user”, use the “vpxuser” and password and press “Next”.
- Tick “Change the default database to” the vCenter Database name recorded earlier.
- Select “Finish”.
- Select “Test Data Source”. Verify “TESTS COMPLETED SUCCESSFULLY!” appears and select “OK”. Then select “OK” again.
- Verify that the “System DSN” tab now has a 32bit “VUMDB” System Data Source with a “SQL Server Native Client 10.0″ driver. Then select “OK”.


Install vSphere Update Manager
- Make sure the vCenter 5.5 Update 1 ISO image has been mounted to the CDROM of the Windows Server 2012 R2 Virtual Machine.
- Open the console of the new vCenter VM running Windows Server 2012 R2 and login with the AD “vCenter” service account.
- Browse to the CDROM and select the “autorun.exe” file and “Run as Administrator”.
- In the VMware vSphere 5.5 vCenter Installer window, select “vSphere Update Manager” from the “VMware vCenter Support Tools” and press “Install”.
- Select “OK”.
- Press “Next”.
- Select “I accept the terms in the license agreement” and press “Next”.
- Deselect “Download updates from default sources immediately after installation” and press “Next”.
- Enter the vCenter “IP Address”, “Username” (service account) and “Password” and press “Next”.
- Select “Use an existing supported database” and select “VUMDB” from the “DSN” drop down menu. Press “Next”.
- Enter the “vpxuser” as the “Database Username” and the “Database Password” and then press “Next”.
- Select the vCenter IP Address from the drop down menu and select “Yes, I have Internet connection and I want to configure proxy settings now” if you have a proxy. Then press “Next”.
- Enter the proxy settings and then press “Next”.
- Change the Install and Patch locations to “E:” and press “Next”. Make sure E: has enough capacity for storing patches (120GB).
- Press “Install”.
- After the installation has completed, press “Finish”.
- You now have to enable the vUM plugin from your vSphere C# client and configure the baselines, then attach them to hosts and VMs for scanning and remediation. An example of this is detailed in Part 10.


Install vSphere Syslog Collector
- In the VMware vSphere 5.5 vCenter Installer window, select “vSphere Syslog Collector” from the “VMware vCenter Support Tools” and press “Install”.
- Select “OK”.
- Press “Next”.
- Change the Install and Repository locations to “F:” and press “Next”. Make sure F: has enough capacity for storing logs (40GB). This will vary based upon the size of the log rotation and number of log rotations to keep.
- Press “Next”.
- Select “VMware vCenter Server installation” and then press “Next”.
- Enter the vCenter “IP Address”, “Username” (service account) and “Password” and press “Next”.
- Press “Yes” to accept the vCenter Server SSL Certificate.
- Press “Next”.
- Select the vCenter IP Address from the drop down menu and press “Next”.
- Press “Install”.
- After the installation has completed, press “Finish”.


Update the Syslog configuration on each ESXi Host
- Open the Web Client of vCenter 5.5 and login as an administrator.
- Select each host and press the “Manage” object. Then “Settings” and the “Advanced System Settings”.
- Scroll down to the “Syslog” area.
- Set “Syslog.global.logDirUnique” to “True”.
- Set “Syslog.global.logHost” to “tcp://<IP Address of vCenter Server>:514″
- Once you have configured each host, browse to the vCenter Repository Directory configured earlier and verify each host has a directory with log files in it.

PART 6
Prerequisites
- You have a licenced and functioning version of vC Ops that was working with vCenter 5.1.
- You have administrator access to vCenter and vC Ops.
- You have checked that your version of vC Ops supports vCenter 5.5. vC Ops version 5.8.2 (Build 1885282) is used in this example.
Reintegrate vCenter Operations Manager with vCenter 5.5
- Open a Web browser and connect to the administrator interface of your vC Ops implementation: “https://<vC Ops IP Address/admin”.
- Login as “admin” with the correct password.
- Select the “Registration” tab and press the “Update” button of the upgraded vCenter 5.5 server in the “vCenter Server Registration” section.
- Re-enter the Registration and Collector passwords and press “Test Connection”. Accept the new SSL certificate and then press “Apply”.
- Open the Web Client to vCenter 5.5: “https://<vCenter 5.5 Web Client>:9443/vsphere-client/” and login as an administrator.
- Browse to the Licence Management screen by selecting “Home”, “Administration”, “Licenses” and then the “Solutions” object.
- Ensure that “vCenter Operations Manager” has a valid licence key assigned. If not, assign one using the “Assign License Key” button.
- Browse to any host and select the “Monitor” tab and then the “Health” object. Verify that the vC Ops “Health”, “Workload” and “Faults” badges are visible with a numerical value.
- In parallel, open the vC Ops user interface from a Web browser: “https://<vC Ops IP Address/vcops-vsphere/” and login as “admin”.
- Browse to the same host as you selected in the Web Client and select the “Operations” object.
- Verify that the “Health”, “Workload” and “Faults” badges are the same values as those displayed in the Web Client.
- Reintegration completed.


PART 7
Prerequisites
- You have completed steps 1 to 6.
- You have administrator access to vCenter.
- You have downloaded the vIN ova for vCenter 5.5 Update 1c.
Unregister the vCenter 5.1 vIN extension
I tried to reregister the original vIN instance with no success, I am sure there is some procedure for this, but I could not find it. So redeploy was the only option left.
- Open a Web browser and connect to the vCenter extension manager: “https://<vCenter IP Address>/mob”
- Login as an administrator and select “UnregisterExtension”.
- Enter “com.vmware.vadm.ngc51″ and press “Unregister”.
- Then enter “com.vmware.vadm” and press “Unregister”.
- Refresh the “ExtensionManager” screen and verify the “vadm” entries are gone.
- Within vCenter, power off and delete the vCenter 5.1 Virtual Appliance.
- This process is also describe in VMware KB 1025360.


Redeploy the vIN Virtual Appliance for vCenter 5.5
- Connect to the Web Client and select the vCenter 5.5 instance that requires vIN.
- Select “Related Objects”, “Virtual Machines” and then select the “Add OVA icon”.
- Browse to the file “VMware_vCenter_Infrastructure_Navigator-xxxx.ova” and press “Next”.
- Press “Next”.
- Accept the EULA and press “Next”.
- Enter the “Name”, select the “Datacenter” object and press “Next”.
- Select the Cluster and then press “Next”.
- Select the “virtual disk format”, “VM storage policy”, “Storage DRS cluster” and then press “Next”.
- Select the “Portgroup” network and press “Next”.
- Enter the “root” password, “Default Gateway”, “DNS” entries, “IP Address” and “Netmask”. Then press “Next”.
- Press “Next”. Note if the vCenter extension service is not running, then access the Windows Server “Services” window and make sure the “vCenter Web Service” is running.
- Select “Power on after deployement” and then press “Finish”.
- After the vIN deployment has completed and powered on, browse to the Licence Management screen by selecting “Home”, “Administration”, “Licenses” and then the “Solutions” object.
- Ensure that “vCenter Infrastructure Navigator” has a valid licence key assigned. If not, assign one using the “Assign License Key” button.
- Press “Home” and then “Infrastructure Navigator”.
- Press the “Turn on access to VMs” button and enter the administrator service account credentials and then press “OK”.
- After some time (depending upon the size of your environment), select any VM and press “Manage” and then “Application Dependencies”. Verify that an “Application Dependencies” map is present.


PART 9
Prerequisites
- You have a licenced and functioning version of vCO Appliance.
- You have administrator access to vCenter and vCO (root & vmware accounts).
- You have have the vCO Appliance update ISO image.
Reintegrate vCO Appliance with vCenter 5.5
- Connect to the vCO Appliance with a Web Browser: http://<vCO IP Address>/.
- Press the “Orchestrator Configuration” link which will connect to http://<vCO IP Address>:8283/.
- Login as “vmware” with the correct password.
- Select the “Network” object and then the “SSL Trust Manager” tab and delete the “vCenter Server”, “SSO” and “Web Client” SSL certificates.
- Enter the new vCenter server URLs for vCenter Server, SSO and vSphere Web Client within the “URL from which to import a certificate” field and press the “Import” button.
- Then press the “Import” button.
- Select the “vCenter Server” object and press the “Hosts” tab. Delete the registered vCenter objects by pressing the “Delete” buttons.
- Select the “New vCenter Server Host” tab and enter each vCenter 5.5 host by completing the “Host” field and entering the administrator service account in the “Username” and “Password” fields. Then press “Apply Changes”.
- You can test that the integration is complete by running a vCO workflow and verifying it connects to vCenter and executes the workflow tasks.


Upgrade vCO Appliance to 5.5
- Mount the vCO update ISO image to the CDROM of the vCO Appliance.
- Connect to the vCO Appliance with a Web Browser: http://<vCO IP Address>/.
- Press the “Appliance Configuration” link which will connect to http://<vCO IP Address>:5480/.
- Login as “root” with the correct password.
- Press the “System” tab and check the vCO version under the “Information” object.
- Press the “Update” tab and then the “Settings” button and set the “Update Repository” to “Use CDROM Updates” and press “Save Settings”.
- The press the “Status” button and “Check Updates”. Once the “Available Updates” message appears, press “Install Updates”.
- When the “EULA” appears, press “Accept”.
- Press “OK” to “Do you want to install updates?”.
- Wait for the “Installing Updates” message to complete.
- Reboot the vCO Appliance by pushing the “Reboot” button under the “System” tab.
- Login and verify that the version information has updated to 5.5.1.0 under the “System” tab.
- Check that vCO is still alarm free by logging into the “Orchestration Configuration” interface.
- Test that workflows still execute by running a vCO workflow and verifying that vCenter executes the workflow tasks.


![]()
PART 10 – Upgrading ESXi
Prerequisites
- You have a licenced and functioning version of vCenter 5.1 with vUM.
- You have administrator access to vCenter and ESXi (root account).
- You have have the ESXi 5.5 Update 1 Driver Rollup 2 ISO image.
- You are booting from DAS, SAN or USB. You are not using AutoDeploy (PXE boot).
Upgrade ESXi 5.1 to 5.5 Update 1
- Place the ESXi 5.1 host in “Maintenance Mode”.
- Mount the ESXi 5.5 Update 1 Driver Rollup 2 ISO image to the host.
- Connect to the DCUI console of the host.
- Reboot the ESXi 5.1 host and allow the host to boot from the ISO image.
- Wait for the “Welcome to VMware ESXi 5.5.0 Installation” message to appear. Press “Enter” to continue.
- Press “F11″ to accept the EULA.
- Select your boot “Storage Device” and press “Enter” to continue.
- Select “Upgrade ESXi, preserve VMFS datastore” and press “Enter”.
- Press “F11″ to upgrade from ESXi 5.1 to ESXi 5.5.
- Press “Enter” to reboot the ESXi host.
- After the ESXi host has booted, verify that the message “VMware ESXi 5.5.0 (VMKernel Release Build xyz)” appears on the DCUI Console.


Use vUM to apply the latest ESXi 5.5 Patches
- Connect to vCenter using the vSphere C# Client as an administrator. You currently cannot use the vSphere Web Client to Remediate hosts with vUM.
- Make sure that the ESXi 5.5 host you just upgraded is connected to vCenter. If the host has not connected, select the host and right mouse click and select “Connect”.
- Select the upgraded host and verify that the window shows the version as “VMware ESXi, 5.5.0, xyz”.
- Verify that the host is still in “Maintenance Mode”.
- Select the “Update Manager” tab and press the “Scan” button.
- Ensure that “Scan the selected hosts for:” “Patches and Extensions” and “Upgrades” is selected. Press the “Scan” button.
- After the scan is complete, the “Host Compliance” should be “Non-Compliant”.
- Press the “Remediate” button.
- Ensure that “Critical Host Patches (Predefined)” and “Non-Critical Host Patches (Predefined)” is selected and press the “Next” button.
- Ensure that all of the “Patches” are selected and press the “Next” button.
- Select “Immediately” for “Remediate the selected hosts:” and press “Next”.
- Press “Next”.
- Select “Disable High Availability admission control if it is enabled for any of the selected clusters” and press “Next”.
- Press “Finish”.
- Wait for the “Remediate entity” task to complete (ESXi host will reboot during this process).
- Verify that the build number has increased and that the “Host Compliance” state is now “Compliant”.
- The ESXi 5.5 upgrade process is now complete, exit “Maintenance Mode” and allow DRS to move workloads to this host.


