
How to add the mic and camera killswitches in Android 12

Android 12 adds killswitches for both the mic and camera. Jack Wallen shows you how to add them and use them.
Image: sdx15/Shutterstock
Android 12 is the most radical change to the platform since its inception. Not only has the interface undergone a drastic (and much-needed) makeover, there are some features that go a very long way to protect users’ privacy.
SEE: Electronic communication policy (TechRepublic Premium)
One such feature is the ability to quickly disable the microphone and camera. This new feature makes it possible for users to shut off access to hardware that could potentially lead to privacy issues. Say, for instance, you notice an app you don’t have open is using the mic or the camera. What do you do? You could quit that app, but maybe (if it’s malware or some other rogue app) that won’t prevent it from using the camera or the mic. With Android 12, you simply tap the killswitch for either the camera or the mic (or both) and then investigate why this happened in the first place.
Once you’ve either removed the suspicious app or concluded that nothing suspicious was going on, you can then enable the mic and camera and go about your business.
But out of the box, the mic and camera killswitches are nowhere to be found. Let me show you how to add them. It’s quite easy, so it shouldn’t take you but a few seconds.
SEE: Samsung Galaxy S21 Series: A cheat sheet (free PDF) (TechRepublic)
What you’ll need
As this feature is only available on Android 12 (which has yet to be released), you’ll need a Pixel device running the beta version of the latest version of the platform. To find out how to sign up for the Android 12 beta program, read How to get the Android 12 beta.
How to add the mic and camera killswitches
Pull the Notification shade down twice and then tap the pencil icon in the far left (Figure A).
Figure A
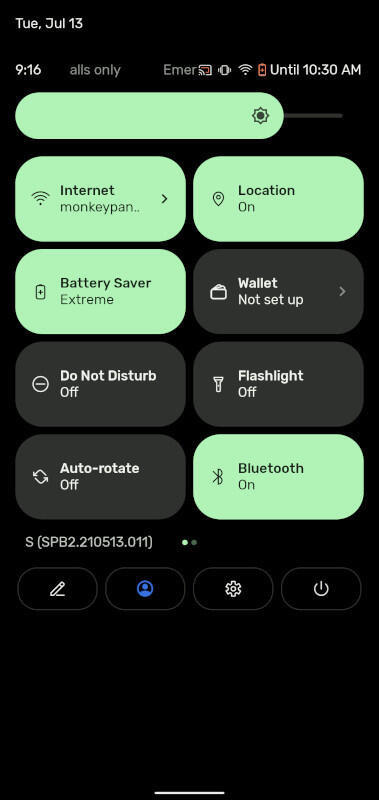
The Quick Tiles edit button is found on the far left side of the icon row.
Once the edit screen appears, locate the Mic Access and Camera Access tiles (Figure B). Tap and drag the Mic Access tile to the top of the screen and then repeat the action for the Camera access tile.
Figure B

Adding the Mic and Camera Access tiles to the Quick Tiles section of the Notification Shade.
Once you’ve dragged the two tiles to the Quick Tiles area, tap the back button (left-pointing arrow at the top of the screen) to save the changes.
How to use the mic and camera killswitches
When you either suspect something untoward is happening, or when you simply want to know no one is watching or listening in on whatever is happening, drag the Notification Shade down twice to reveal the Quick Tiles section. Swipe to the left and you should see both the mic and camera killswitch tiles (Figure C).
Figure C
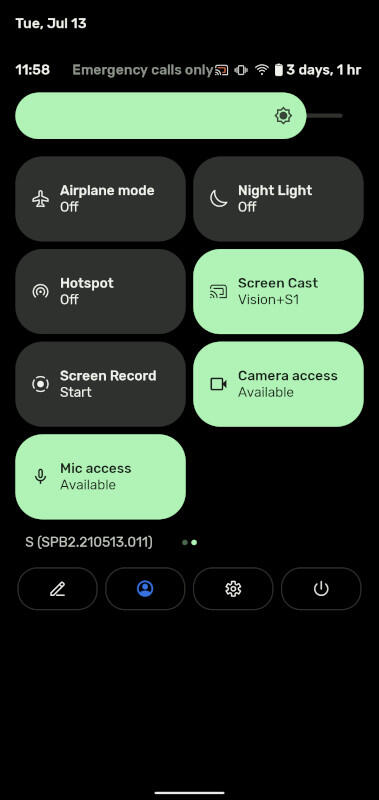
The mic and camera killswitches are ready for use.
Tap either the mic or camera (or both) kill switches to disable the feature(s) on your device. Once disabled the mic or camera will not function until you enable them.
And that’s all there is to adding the mic and camera kill switches to Android 12. If you require extra security with your Android device, this might well be the feature you’ve been waiting for. Just remember to re-enable your mic and/or camera before you need them again.
Subscribe to TechRepublic’s How To Make Tech Work on YouTube for all the latest tech advice for business pros from Jack Wallen.

5G and Mobile Enterprise Newsletter
5G networks and devices, mobile security, remote support, and the latest about phones, tablets, and apps are some of the topics we’ll cover.
Delivered Tuesdays and Fridays
